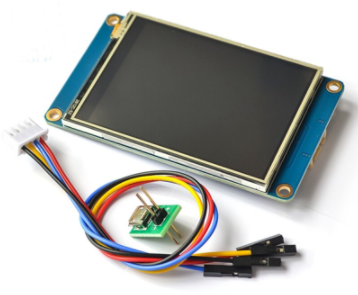
Nextion displays offer the possibility of having an interactive screen that can be easily controlled by a serial link. Here we connect it to an orange pi zero to show the basic functionality. Write text or values and retrieve information each time a field on the screen is touched.
Orange PI Zero preparation
First, you have to load the Armbian operating system on the Orange Pi Zero as explained in the article https://f1atb.fr/index.php/fr/2020/03/27/mise-en-route -orange-pi-zero /
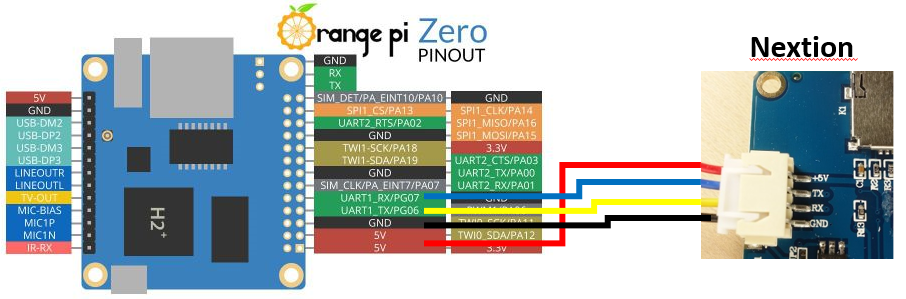
For the serial link we will connect the Nextion to the UART1 of the Orange Pi. We supply the Nextion by the 5v of the Orange PI and we connect the TX-RX in each direction.
UART1 must be activated through the configurator.
$ armbian-config
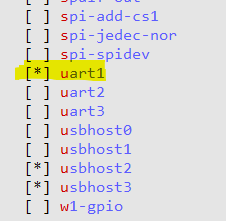
Select the System item then Hardware and validate UART1.
For the serial link, install the python-serial or python3-serial library.
$ apt-get install python-serial
or
$ apt-get install python3-serial
Nextion Editor
For the Nextion display, programming takes place in 2 stages:
- a definition of the various text fields, values, images, etc. desired using a graphic editor
- writing a program on the Orange Pi to write the information in the fields and read the manual actions on the screen.
On the site https://nextion.tech in the download section you can download the graphic editor to put on your PC. Once installed, go to the “File” and “New” section to start a new project.
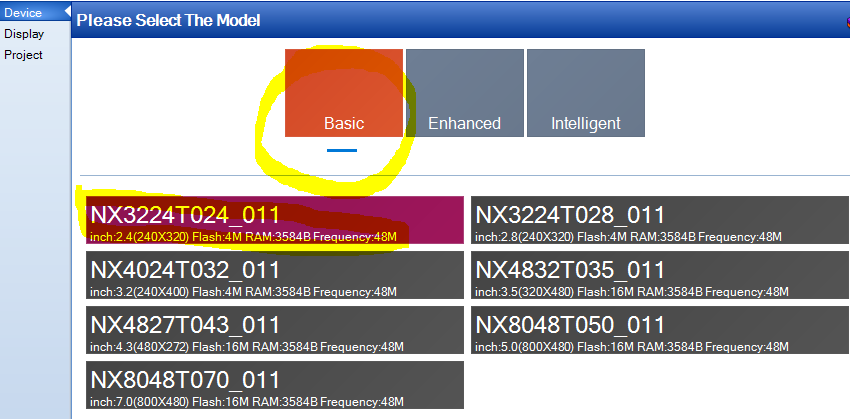
- In the “Device” tab, choose your screen model
- In the “Display” tab, choose the orientation of the screen
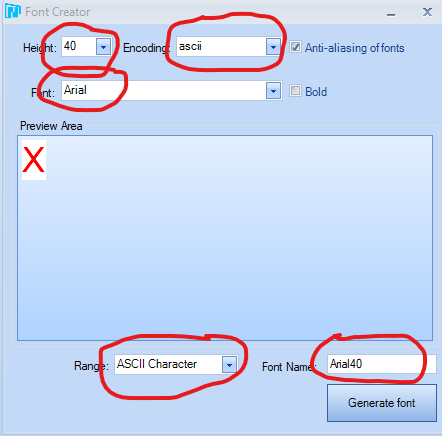
Go to “Tools”, “Font Generator” to define the fonts you want to use for your project. To keep things simple and not to generate large files, choose an Ascii encoding and the generation of fonts only for Ascii characters. For example, make 2 sets of fonts to use later.
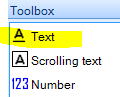
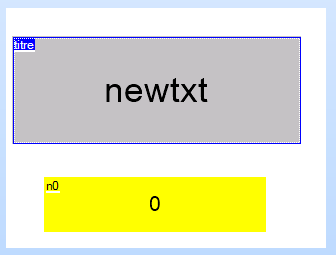
In “Toolbox” choose “Text” and position the text zone on the screen. Give it a name, here “titre” in “objname”.
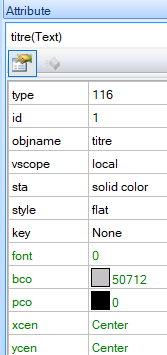
There is an identification number “id” the number of the created font visible in the “Font” tab at the bottom left, the background color and the text color. The values in green can be changed by programming from the Orange Pi, the black ones are frozen.
Create a second Number type field, the name of which will be kept “n0” by default.
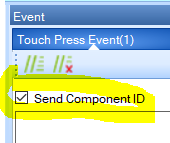
If you want to be informed when a field is pressed, select it and check the “Touch Press Event / Send Component ID” box.
Once the design is completed, we launch a compilation of the code, heading “File”, “TFT output”, which generates a .tft file that must be transferred to a microSD card of 32GB or less initially formatted in “FAT32”. Then insert the microSD card on the Nextion and turn it on to transfer the file.
Once the transfer is complete, disconnect the 5v power supply, remove the microSD card and connect the Nextion to the Orange Pi Zero as explained above.
Orange Pi Zero programming
In the folder of your choice, create a source file in python3.
nano test1.py
Put the code below which:
- opens a serial link: ‘ser’
- defined a function for receiving data from the nextion which, if nothing is available, returns control after the timeout defined in ‘ser’
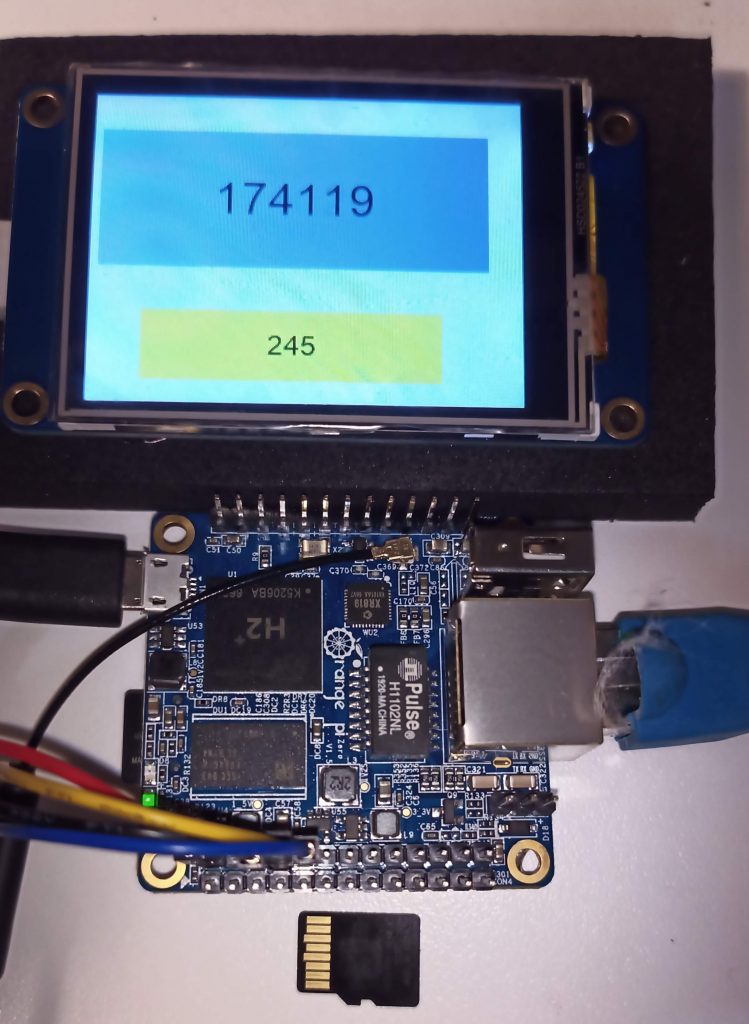
- write the time in the ‘titre’ field
- increments a counter in the numeric field ‘n0’
import time
import serial


ser = serial.Serial(
  port='/dev/ttyS1',
  baudrate = 9600,
  parity=serial.PARITY_NONE,
  stopbits=serial.STOPBITS_ONE,
  bytesize=serial.EIGHTBITS,
  timeout=0.2 # timeout in reception in seconds
)

def serialReceive():
  received_data = ser.read() #read serial port
  data_left = ser.inWaiting() #check for remaining byte
  received_data += ser.read(data_left)
  print (received_data)


i = 0
while True:
  EndCom = b'xffxffxff' #End of each command as bytes
  temp = 'titre.txt="'+time.strftime('%H%M%S')+'"' #local time
  temp = temp.encode('ascii') #conversion unicode in ascii
  ser.write(temp + EndCom) #write in text field 'titre'
  i=i+1
  ser.write(b'n0.val=') #write value in numeric field 'n0'
  ser.write(str(i).encode('ascii'))
  ser.write(EndCom)
  serialReceive()
All the commands to be passed to Nextion are in the form of byte with the Ascii code of each letter if it exists or xff for example. Note that each command ends with 3 bytes xff, xff, xff.
Start the program:
python3 test1.py
Each time you press one of the fields, Nextion returns bytes which give ‘e’ for the event, the field ID and the direction, touched or released if the corresponding boxes were checked in the design. At the end, the 3 bytes \ xff \ xff \ xff.
b'e\x00\x02\x01\xff\xff\xff'
So here is a simple way to create a graphical interface that can be easily controlled from an Orange Pi Zero at less than 20 € or any other nano computer.
Authorization to access the serial port
Access to the GPIO or serial ports is limited to the root user. If you access for example from a cgi script launched by a web page managed by an Apache2 server you will probably get an error like:
Permission denied: ‘/ dev / ttyS1
Go to the / dev folder, you will see that ttyS1 belongs to the group dialout. Add the Apache2 user to this group, namely “www-data”.
adduser www-data dialoutUpload .tft file via serial port
A faster alternative to uploading the .tft configuration file to the Nextion is to directly use the Orange Pi on which it is connected. Here is a python2 program found on the web which facilitates this phase.
#
# Original: Python Upload script (historic), Bjoern Schrader
# See: http://support.iteadstudio.com/support/discussions/topics/11000007783
# and Omerbeg
# https://github.com/omerbeg/nextionupload/blob/master/nextionupload.py
# My small modification to support my nextion display connected on Orange PI Zero
# This version can upload a tft file to a nextion display connected on Orange PI Zero via Uart1
#

import threading, time, os, sys, serial

PORT = '/dev/ttyS1'
BAUDCOMM = 9600
BAUDUPLOAD = 115200

if len(sys.argv) != 2:
	print 'usage: python %s file_to_upload.tft' % sys.argv[0]
	exit(-2)

file_path = sys.argv[1]

if os.path.isfile(file_path):
	print 'uploading %s (%i bytes)...' % (file_path, os.path.getsize(file_path))
else:
	print 'file not found'
	exit(-1)

fsize = os.path.getsize(file_path)


ser = serial.Serial(PORT, BAUDCOMM, timeout=.1, )

waiting = False

def reader():
	global waiting
	while True:
		r = ser.read(128)
		if r == '': continue
		if waiting and '\x05' in r:
			waiting = False
			continue
		print '<%r>' % r

threader = threading.Thread(target = reader)
threader.daemon = True
threader.start()

ser.write([0xff, 0xff, 0xff])
ser.write('connect')
ser.write([0xff, 0xff, 0xff])
time.sleep(.5)

ser.write('whmi-wri %i,%i,res0' % (fsize, BAUDUPLOAD))
ser.write([0xff, 0xff, 0xff])
time.sleep(.1)

waiting = True
ser.baudrate = BAUDUPLOAD
print 'waiting hmi'
while waiting:
	pass

with open(file_path, 'rb') as hmif:
	dcount = 0
	while True:
		time.sleep(.1)
		data = hmif.read(4096)
		if len(data) == 0: break
		dcount += len(data)
		print 'writing %i...' % len(data)
		ser.write(data)
		sys.stdout.write('\rDownloading, %3.3f...        ' % (dcount/868631.0*100.0))
		sys.stdout.flush()
		waiting = True
		print 'waiting for hmi...'
		while waiting:
			pass


ser.close()