Apache – PHP – MariaDB – phpMyAdmin
The power of nano-computers and the availability of optical fiber at home allow the establishment of a personal web server for private use, even open to the entire web. The solution proposed here is a great classic spread in millions of copies around the world.
- Apache: in version 2, the most used internet server
- PHP: language used to boost the site by adapting the content of the web pages sent to the context
- MariaDB: Any website with content needs a database. MariaDB is an open source clone of the famous MySQL database.
- phpMyAdmin: to manage the content of the database. phpMyAdmin makes the task much easier.
- Orange PI: in the family of nano-computers, there is the well-known “Raspberry Pi” but here I use an equally powerful “Orange Pi” at a lower cost by buying it directly in China.
Orange PI Selection
By going to the Orange Pi site you will find a multitude of cards. The proposed server can run on the simplest of them, the Orange Pi Zero. For not much more expensive, one can choose a card with an H5 or H6 processor and an Ethernet at 1Gb / s if one has an adequate network and an optical fiber in input / output. Here having an Orange PI PC2 H5, I will use this card. The orange Pi One Plus H6 is also a good solution.

Armbian – Operating System
The processors of the Orange Pi being used for tablets, we find several operating systems like Android, ArmBian … In our case we chose Armbian Buster (January 2021) which we find on the site https: //www.armbian.com/ in the “download” section. This version is adapted from Linux / Debian for ARM family processors.
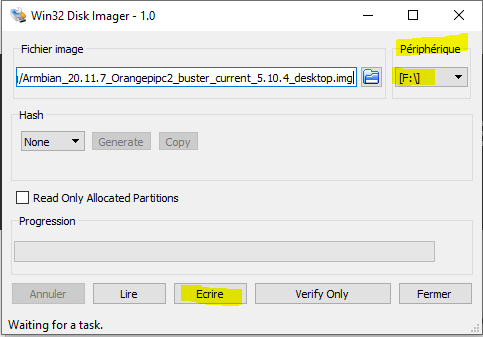
The downloaded file is compressed (extension .xz). Use a decompressor such as 7zip to extract the .img image file that must be installed on a 32 or 64GB microSD memory card.
IP Address
- Connect the card to the network with an ethernet cable and turn on the power.
- Go to its box or network management software to find the assigned IP address.
- Connect in ssh (Bitwise ssh client software or other) for the first time with the username “root” and the password “1234”
- Answer the questions to define a user, password etc …
- Update your distribution:
- “apt-get update” or “sudo apt-get update” if you are not root
- “apt-get upgrade” or “sudo apt-get upgrade”
If you want to add additions to your system like:
- Samba: to directly access files from a Windows PC
- VNC: to have a graphical interface on a remote PC
you will find the explanations in this article.
Installing the Apache 2 web server
Apache2 is one of the world’s most widely used, robust and reliable web server applications. It runs perfectly on SBC (Single-Board Computer) like the Orange Pi.
Install Apache2:
apt install apache2 -y
add sudo if you are not root user
Once installed, type in the address field of your favorite browser the IP address of the server. Ex: 192.168.0.100
In return you will have the Apache home page confirming the proper functioning of the web server.
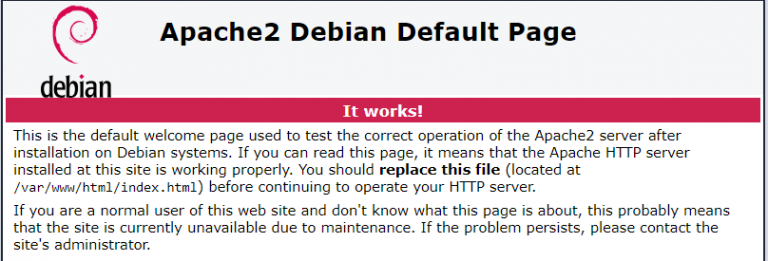
This page is located in the folder: /var/www/html/
This index.html file can be replaced by yours to get started with your new server.
PHP Installation
To boost the content of your site, you must install a language such as php which will allow you to modify the content of the page sent according to the context and not be limited to static pages.
We will proceed to the installation of 2 packages:
apt install php libapache2-mod-php
The first installs the language, the second allows to link with Apache to insert dynamic content.
Once the installation is done go to the folder of the Apache server where the pages of your site are located.
cd / var / www / html
We will create a small file in php language which will allow us to test the Apache / Php couple
nano info.php
Write in:
<?php
phpinfo();
?>
Go to your browser and call up the corresponding page:
http: //server_ip_address/info.php
In return if everything works you have the info on php:

MariaDB Installation
For a website with content, you need a database. Initially with Apache and PHP we installed MySQL. Now the Open Source MariaDB clone version of Mysql is installed.
apt install mariadb-server
Then secure the MariaDB server by creating a root password and preventing remote root access.
mysql_secure_installation
Many questions are asked to configure MariaDB
In order to log into MariaDB to secure it, ....
Enter current password for root (enter for none): Write nothing

Setting the root password .....
Set root password? [Y/n] Y
New password: *****
Re-enter new password:*****

Remove anonymous users? [Y/n] Y

Disallow root login remotely? [Y/n] Y
 .
Remove test database and access to it? [Y/n] Y

Reload privilege tables now? [Y/n] Y
… Success!Installation should now be secure.
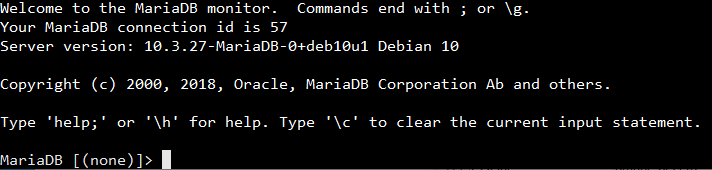
Test that MariaDB is correctly installed.
mysql -u root -p
Take the opportunity to create another non-root user to access the MariaDB database.
MariaDB [(none)]> CREATE USER ‘uuuuuu’@’localhost’ IDENTIFIED BY ‘pppppp’;
Replace uuuuuu with a username and pppppp with a password.
Temporarily give it all the privileges:
GRANT ALL PRIVILEGES ON *.* TO ‘uuuuuu‘@localhost IDENTIFIED BY ‘pppppp‘;
Afterwards, once your system is completely configured, consider limiting the privileges.
Type exit to exit.
phpMyAdmin Installation
To manage the database, going through online orders is tedious. It is best to install a tool like phpMyAdmin which will use Apache and PHP to provide database management web pages.
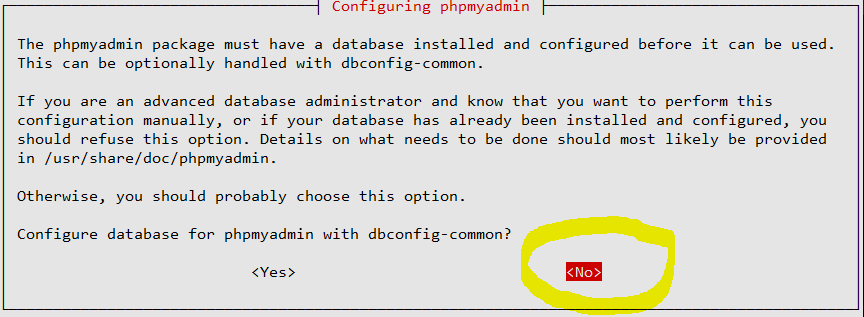
apt install phpmyadmin
In case of an error:..phpmyadmin : Depends: php-twig (>= 2.9) but 2.6.2-2 is to be installed….
aptitude -t buster-backports install php-twig
Then resume the installation.
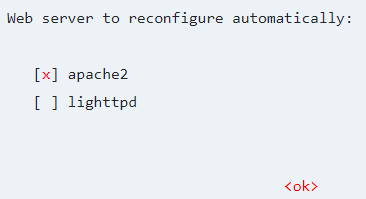
Enter the MariaDB database password for the user created above.
In the Apache configuration file you must declare phpMyAdmin. Open file
/etc/apache2/apache2.conf
At the end add the line:
Include /etc/phpmyadmin/apache.conf
Relaunch Apache:
service apache2 restart
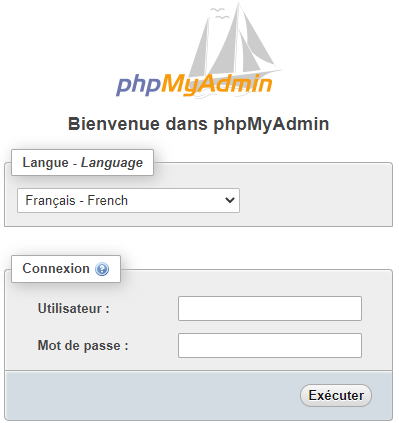
In your browser enter http://IP_du_Serveur/phpmyadmin
For the user and the password put uuuuuu and pppppp as defined above.
Virtual Host Apache
It is possible on the same web server to process several distinct sites. The configuration settings for each are described in a .conf file located in the folder:
/etc/apache2/sites-available
In addition to the original ‘000-default.conf’ file, you can add the files:
– site1.conf
– site2.conf
in which the configuration is defined.
<VirtualHost *:80>
        ServerName site1.com
        ServerAlias www.site1.com
        ServerAdmin webmaster@site1.com
        ErrorLog /var/log/apache2/site1-error_log
        TransferLog /var/log/apache2/site1-access_log
        DocumentRoot "/var/www/html/site1/"
        <Directory "/var/www/html/site1/">
                Options Indexes FollowSymLinks
                AllowOverride All
                Require all granted
        </Directory>
</VirtualHost>
To enable the site:
a2ensite site1
To disable the site:
a2dissite site1
To restart Apache:
service apache2 restart
This Post Has One Comment
Comments are closed.
Pingback: Hosting your own public website from home on an Orange Pi Zero 2! – Savvy Creative Adventurer