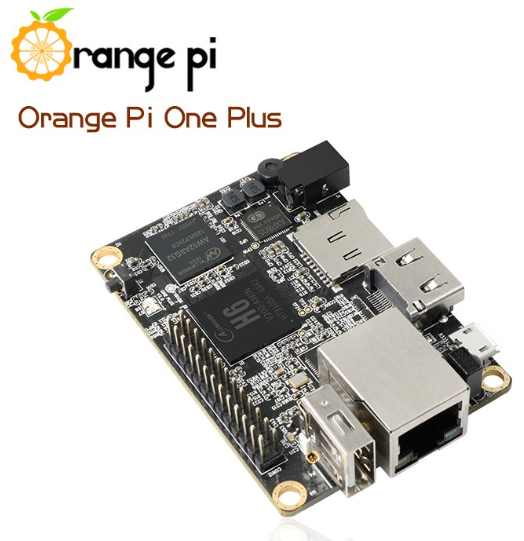
The Orange PI One Plus is a powerful development board offering many possibilities with its 64-bit 4-core processor (H6), ethernet, HDMI, USB etc … for less than 30 €. Take a look at aliexpress.com
Note that this procedure applies for other Orange Pi such as the Orange PI PC2, which also has a 64-bit 4-core processor (H5).
Linux / Armbian Installation
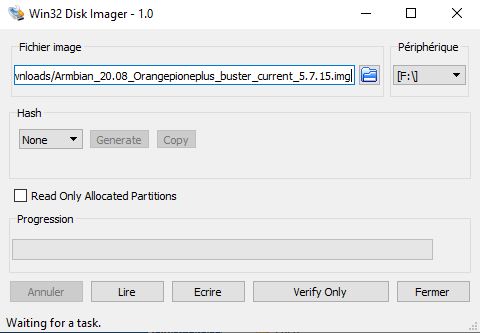
- Download the Linux operating system for ARM processors, Armbian buster (March 2020) from armbian.com.
- Choose the version in the “Download” section that corresponds to your hardware.
- Unzip to create the .img file to burn to a microSd card (32GB class 10 for example) using software such as “Win32 disk Imager”.
IP Address
Place the memory card on the Orange PI, connect the assembly to the network with an ethernet cable and switch on.
Go to internet box or network management software to find the assigned IP address.
Connect in ssh (Bitvise ssh client software or other) for the first time with the username “root” and the password “1234”.
You will be asked to give a new password for root, then you will have to create a user with a password.
Update your distribution:
$ sudo apt-get update
$ sudo apt-get upgrade
Desktop installation and VNC
To have a nicer graphical access, it is necessary to have a desktop in the basic installation of the system. To do this, you have to change the configuration by running ‘armbian-config’, the equivalent of ‘raspiconfig’ on Raspberry. Log in to your user account then:
$ sudo armbian-config
Go to the “system” section and select “Install Desktop”. This is not necessary for certain Orange PI cards which have the Desktop installed as standard.
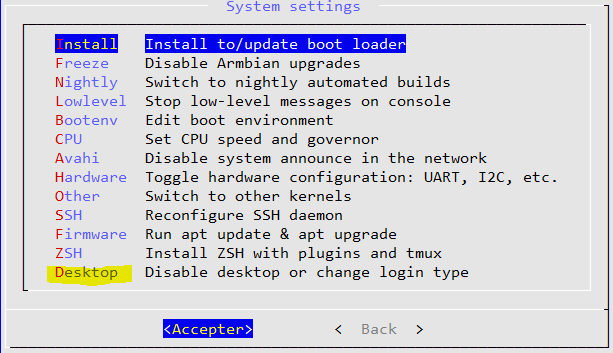
Take advantage that you are in the configuration of your Orange-PI to set your time zone, define the system language etc …
To view the desktop without connecting a screen, it is possible to use the VNC client as an extension of the ‘browser’Chrome on a remote PC. OrangePi side, you have to install TightVNC with the command:
$ sudo apt-get install tightvncserver
Install xfonts-base to avoid the “could not open default font‘ fixed “error when launching vncserver.
$ sudo apt-get install xfonts-base
Launch VNC in manual mode
$ vncserver :1
You will be asked for a password. Do not put more than 8 characters. You can now test VNC with for example the chrome VNC extension by connecting to ‘address_ip_orangepi: 5901’.
For an automated launch we will create a script file:
$ sudo nano /usr/local/bin/mon_vnc.sh
#!/bin/bash
PATH="$PATH:/usr/bin/"
DISPLAY="1"
DEPTH="16"
GEOMETRY="1024x768"
OPTIONS="-depth ${DEPTH} -geometry ${GEOMETRY} :${DISPLAY}"
case "$1" in
start)
/usr/bin/vncserver ${OPTIONS}
;;
stop)
/usr/bin/vncserver -kill :${DISPLAY}
;;
restart)
$0 stop
$0 start
;;
esac
exit 0
Copy the text above and copy it to nano with a right click if you are using Bitwise SSH. Remember to make this file executable.
sudo chmod +x /usr/local/bin/mon_vnc.sh
We can now perform the following 3 operations:
sudo /usr/local/bin/mon_vnc.sh start
sudo /usr/local/bin/mon_vnc.sh stop
sudo /usr/local/bin/mon_vnc.sh restart
For an automatic launch of VNC when booting the orangepi we create a service in ‘systemd’.
$ sudo nano /lib/systemd/system/mon_vnc.service
[Unit]
 Description=Manage Mon Serveur VNC
 [Service]
 Type=forking
 ExecStart=/usr/local/bin/mon_vnc.sh start
 ExecStop=/usr/local/bin/mon_vnc.sh stop
 ExecReload=/usr/local/bin/mon_vnc.sh restart
 User=XXXXXX
 [Install]
 WantedBy=multi-user.target
Replace XXXXXX with your username under armbian or root.
For the inclusion of this new service in systemd.
$ sudo systemctl daemon-reload
$ sudo systemctl enable mon_vnc.service
Now you can reboot your system and verify with VNC the connection in graphical mode.
For starting, even stopping etc …
$ sudo systemctl start mon_vnc.service
$ sudo systemctl stop mon_vnc.service
$ sudo systemctl restart mon_vnc.service
$ sudo systemctl status mon_vnc.service
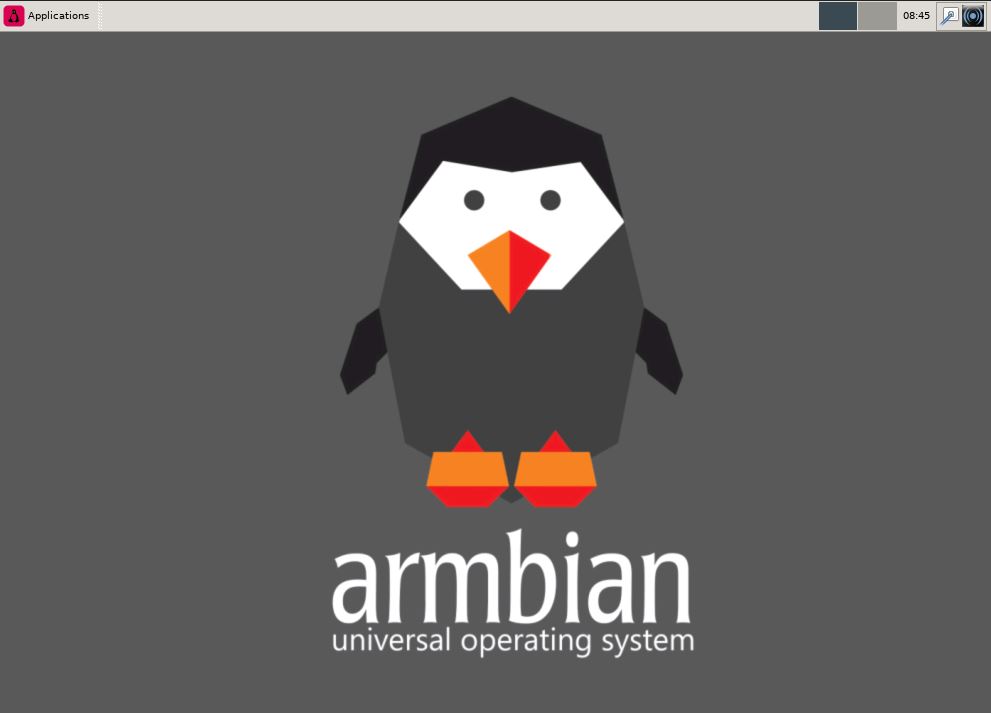
Now you have an Orange One Plus that can be controlled remotely from a PC on your network.
Desktop folder or local name folder
Having chosen the French customization of the Armbian installation or any other local customization, the desktop folder is called by a local name and not Desktop. To avoid any conflict later with the installation of other applications, we can create a symbolic link. Go to your user folder:
$ cd ~
$ ln -s local_dektop_name Desktop
Thus the 2 folderts will be present and will have the same content. You can do the same for the Downloads folder:
$ ln -s local_downloads_name Downloads
Samba setup
To easily exchange files between the OrangePi and a PC on the network, it is interesting to install Samba which will allow you to view it.
$ sudo apt-get install samba samba-common-bin
You must modify the configuration file to adapt it to the network and define the permissions.
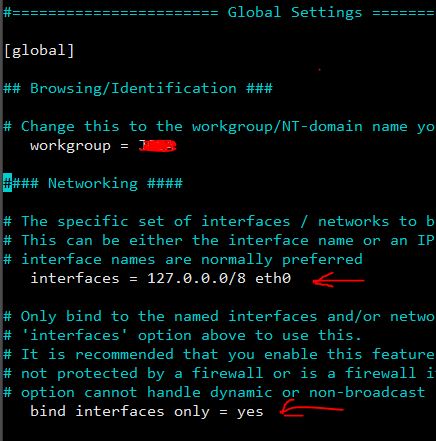
$ sudo nano /etc/samba/smb.conf
At the start of the file, define the workgroup (“Workgroup” or other) and define the interface by removing it; or #. .
Then at the bottom of the file add the following lines:
[Opi]
comment = Partage Samba sur Orange Pi
path = /
writable = yes
guest ok = yes
guest only = yes
create mode = 0777
directory mode = 0777
share modes = yes
With path = / , this allows access to all folders of the system. Be careful to put the chmod permissions … which are fine.
Restart samba
$ sudo systemctl restart smbd.service
Now the OrangePi should be visible to other PCs on the network.