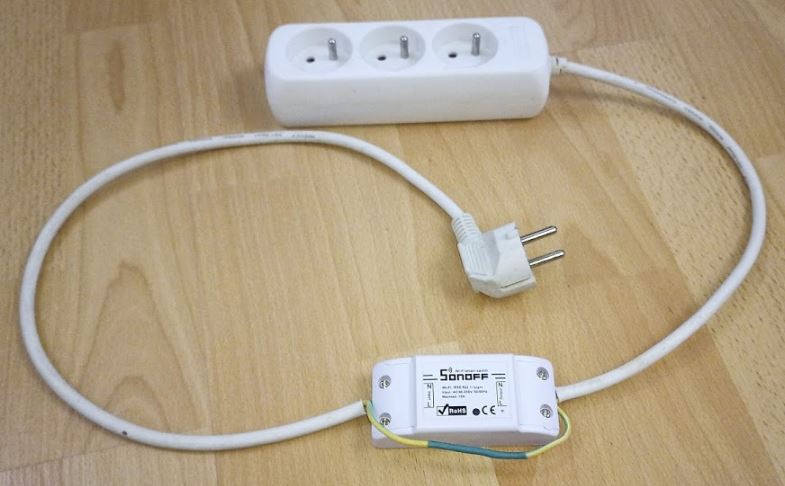
If you need to power or cut the mains remotely on a transmitter or a relay for example, home automation solutions exist. What I am offering here is a solution for which you can customize the startup or shutdown logic.

For the Hardware part, take a SonOff (basic) set that can be found for € 10 on Amazon or Ebay. It is a relay controllable by Wifi using a microcontroller of the ESP8266 family. A push button and an LED allow local control. On one side of the box we supply 220v, on the other we go out of 220v or not depending on the state of the relay.
For the software part, do not take the software originally installed on the SonOff which requires you to go through China to control the power supply of your equipment. Implement the open source ESP Easy firmware which does wonders without having to worry about complicated programming.
Firmware installation
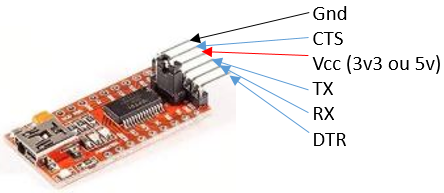
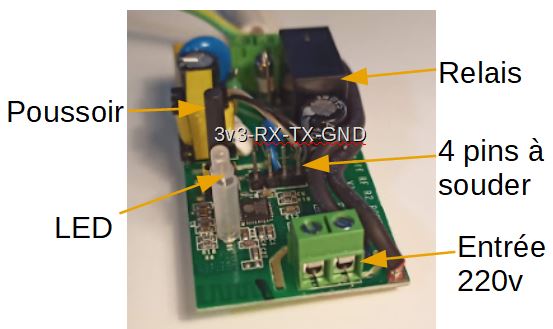
Open the SonOff, in the middle of the PCB, there are 4 holes where you can solder 4 pins to program the SonOff with a USB TTL adapter that you can find for 6 € at Amazon, Cdiscount, Ebay …
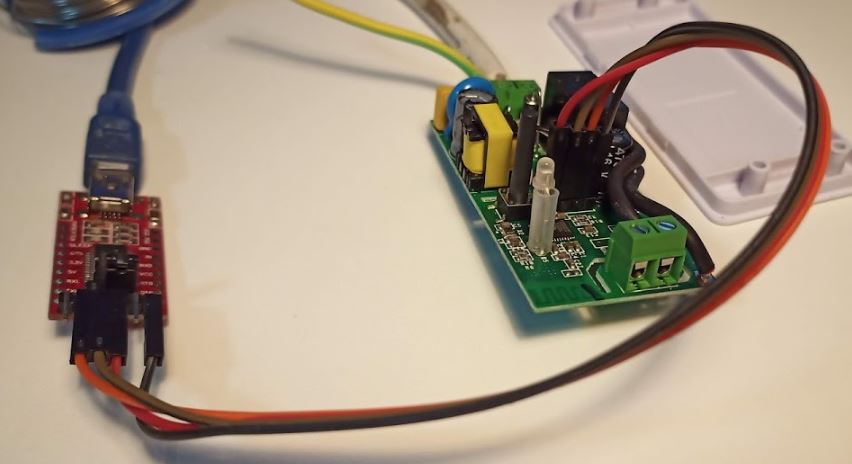
Connect the adapter to the SonOff circuit as follows:
| Adaptateur TTL 3v3 | SonOff |
| Ground | Ground |
| TX | RX |
| RX | TX |
| Alimentation 3v3 | 3v3 (pin close to push button) |
The other pins of the adapter are not used.
Attention on 3 points:
- On the adapter, put the jumper on 3v3 and not stay in 5v. It will feed the SonOff (ESPEASY).
- Some SonOffs have 5 additional holes to access the GPIO14 which allows you to connect a sensor such as a thermometer.
- In particular, do not power the SonOff with the 220v input. Insulation is not guaranteed.
We need the latest version of the ESP Easy firmware found on github. Download the last “Release Mega xxxx” in .zip and unzip the whole.
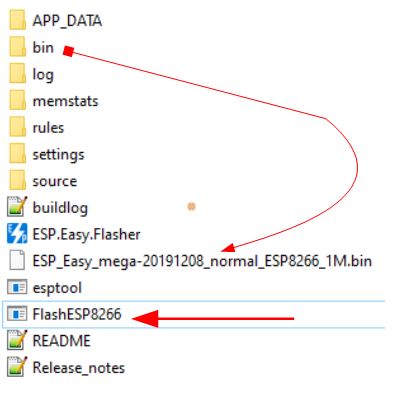
There are several possible binaries. For the ESP chip located in SonOff, take the version titled “normal_1M_ESP8266” which is in the “bin” sub-folder by copying it to the same folder as the flash software, “FlashESP8266”.
Launch the “FlashESP8266” program, select the serial port on which windows has attached the USB port of the adapter.
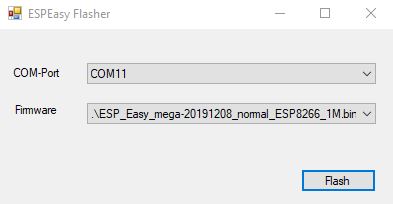
To switch SonOff (Esp) to programming mode, keep the push button pressed when powering up, plugging in the USB cable. Then you start the programming which will take about a minute.
Note: with the latest versions in 2020, I have a lot of WiFi cuts. An older version from 2018:
ESP_Easy_v2.0-20180124_normal_ESP8285_1024.bin
gives good results, suitable for the 8285 processor.
WIFI programming
Restart the SonOff by cutting and re-feeding it either by the 3v3 or directly by the 220v input (while being disconnected from the adapter). At this moment the ESP does not know which WiFi network to connect to, it will switch to WiFi access point mode and emit its own signal. Open your phone or a PC with Wifi and search for a network called ESP …., connect to this network. If a password is requested it is “configesp”. A web page will open and you will see the list of wifi networks around you. Select your wifi and give your network password. The ESP will enter your Wifi in its settings and switch to it to continue programming. This operation is delicate and often it is necessary to repeat it several times. To limit the setbacks, do this operation near the box which emits the wifi signal so that it is strong and not too disturbed by the neighborhood. When switching to your Wifi network, locate the IP address that your box will have assigned by DHCP to the ESP. For information, the initial connection operation to the ESP wifi signal is usually done at the IP address: 192.168.4.1. It can help in some cases.
Configuring SonOff (ESP)
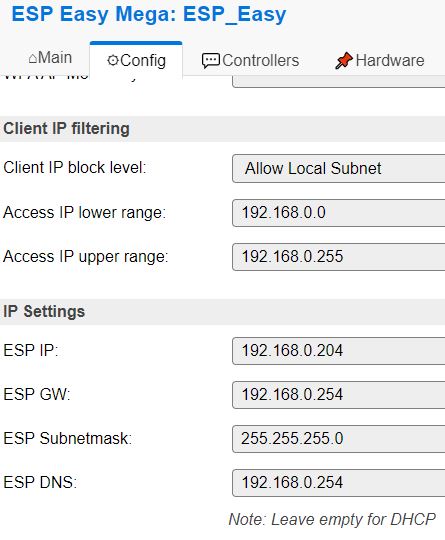
Once connected to your WiFi network, you access SonOff by entering the IP address 192.168.xxx.xxx assigned by your box in a browser. A mini WEB server on the ESP allows you to configure and personalize the whole. To set the IP address of your SonOff (ESP) rather than using DHCP assignment, go to the “Config” tab.
The “Controllers” tab allows, if necessary, to link the ESP to a central home automation management system such as Domoticz. In the “Hardware” tab, there is nothing to do.
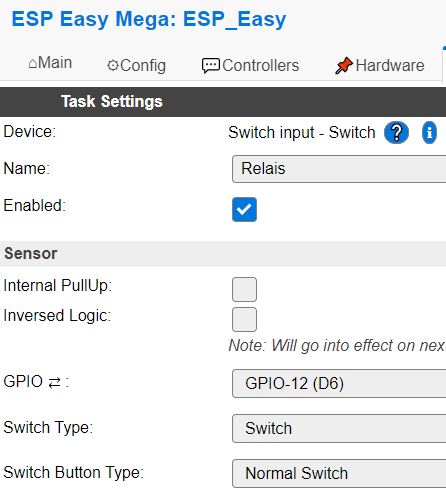
The “Device” tab is important for declaring the relay and the push button connected to the ESP.
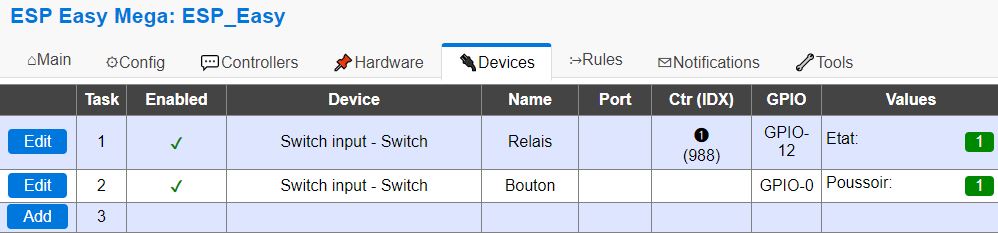
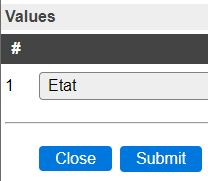
Edit a line for the relay that is connected to the GPIO-12.
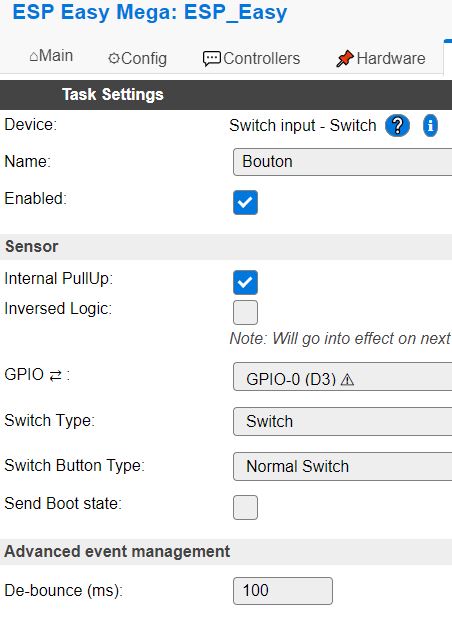
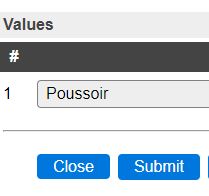
For the push button, it is on the GPIO-0
The LED is connected to GPIO 13 but does not need to be declared in the devices. It will be addressed directly in the “Rules” tab which allows programming customization. Edit “Rules 1” and enter the following program:
On System#Boot do
   timerSet,1,2
  GPIO 13,1 // LED  Off
  event Allumer
 endon

 On Rules#Timer=1 do
   GPIO 13,1
 if [Relais#Etat]=1
     timerSet,1,1
     Pulse,13,0,900  //Flash LED long Power On
   else
      Pulse,13,0,50 //Flash LED court Power Off
       timerSet,1,3
   endif
 endon

 On Bouton#Poussoir=0 do
     if [Relais#Etat]=1
         GPIO 12,0 //Relais Off
   else
         GPIO 12,1  //Relais On
      endon
   endif
 endon

 On Allumer do
     GPIO 12,1  //Relais On
 endon

 On Eteindre do
     GPIO 12,0  //Relais Off
 endon
As shown in the above programming we have:
- the relay goes on when the power is turned on to restore the current following a cut.
- The LED is on the GPIO-13 and lights up if 0
- Thanks to timer 1, the LED flashes short if the relay is off and flashes long if the relay is on
- With the push button you can turn on or off
With the programming language of ESPEasy which can be found on the site of good tutorials, it is possible to implement many other features such as taking into account the time, sending emails etc.
To turn on or off remotely send the following commands from the address bar of a browser:
- http: //192.168.x.y/control? cmd = event, Switch on
- http: //192.168.x.y/control? cmd = event, Turn off
replacing x and y with the IP address of the ESP on the network. For access from the outside world, do a port forwarding at the Internet Box level to port 80 of the ESP.