Remote SDR v5 – Manual Installation
GNU RADIO 3.9 – Osmocom – Soapy SDR
RTL-SDR – HackRF – Adalm-Pluto – RSP1 – RSP1A – SA818
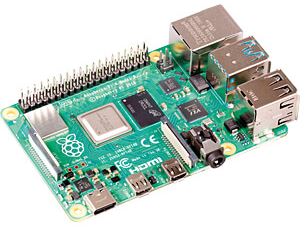
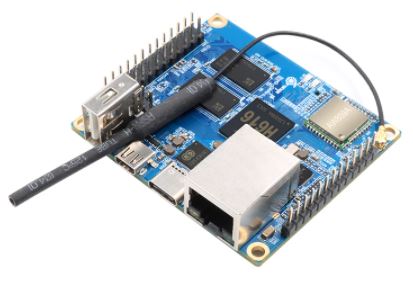
Below is the detailed procedure for installing Remote SDR in version 5 on a Raspberry Pi 4 B (2Go) or an Orange Pi Zero 2. It is adaptable for other ‘Single Board Computer’ boards if they have the computing power needed like the Raspberry Pi4.
Please note that this procedure is long and complex. If possible, it is best to use an SD card image available for the Raspberry 4B and orange pi Zero 2.
Sources and images will be available on Githubhttps://github.com/F1ATB/Remote-SDR
Version 5 of Remote SDR is built around the OS Armbian (Bullseye) for the Orange Pi Zero 2 and Raspberry OS (Bullseye) for the Raspberry 4B. GNU Radio dedicated to signal processing is now in version 3.9. Manual installation takes several hours. To date, March 2022, you have to go through a compilation of many source software and especially GNU-Radio 3.9. Binary packages are not yet available.
Installing Linux System
Before installing the radio signal processing, the basic operating system must be installed. The procedure is detailed here:

Download the Linux operating system for ARM processors, Armbian Bullseye from armbian.com for the Orange pi zero 2 and load it onto a microSD card.
Obtain the IP address and connect in SSH.

The Raspberry Pi OS in Bullseye version can be downloaded from the Raspberry website. Choose the version with Desktop only.
- Make a raspi-config in a terminal or go to the settings to activate SSH access and VNC access.
- Configure Samba if you want to access files from your Windows PC rather than SSH.
Node JS Installation
In previous versions of Remote SDR, an Apache server served web pages. Since version 5, a web server based on Node JS is used.
Switch to root if necessary with:
sudo suDownload version 16 or more recent of Node JS then launch the installation.
curl -sL https://deb.nodesource.com/setup_16.x | bash -apt-get install -y nodejsReboot the system.
For a first installation to create a project, several add-ons are needed to manage dynamic web pages and network communications. For Remote SDR, create a remsdr folder at the root and give it all rights first. Go to the project folder:
cd /remsdr
If you copy an existing project, you can skip this step
npm install html
npm install https
npm install ejs
npm install express
npm install jquery
npm install socket.io
npm install net
npm install fs
npm install cors
npm install xmlrpc
npm install onoff
npm install dgram
Generation of a security certificate
For Remote SDR, in order to access the microphone of the client PC, you must access the web server on the Raspbery/Orange pi in https. In previous versions of Remote SDR, an override was implemented. Here we will put a self-signed security certificate that will facilitate access to the microphone.
Open SSL must be installed on your system. It allows the generation of a security certificate in order to access your site in https. Run the following command:
openssl req -x509 -nodes -days 365 -newkey rsa:4096 -keyout selfsigned.key -out selfsigned.crtThese files will be called by the web server (Radio_Server.js) made with node js.
Below is a snippet of the code:
const http = require('http');
const https = require('https');
var httpserver = http.createServer(app);
const fs = require('fs');
const options = {
      key: fs.readFileSync('selfsigned.key'),
      cert: fs.readFileSync('selfsigned.crt')};

--_ Your Project ---

httpserver.listen(80);
https.createServer(options, app).listen(443);
GNU Radio Companion Installation
GNU Radio is a very powerful tool for modeling signal processing chains. GNU Radio Companion is a complementary tool allowing to build radio processing chains graphically without writing a line of code. We will install version 3.9 from sources knowing that the binary package currently available is version 3.8 only. This version 3.9 will allow us to add to Remote SDR, the SDRs of the SDR play family such as the RSP1 and RSP1A which cover the HF radio amateur bands with a dynamic range of 12 to 14 bits.
In the case of an Orange Pi Zero 2 having only 1GB of memory, the compilation of the Gnuradio Source is impossible. The system will access the swap memory on the SD card which is only 482MB and it is not enough. You can control with the command:swapon --show
With the htop command, you can view swap usage in real time.
You can add 4GB back and then return to the original system value after the compilation is complete. I used the following tutorial:
https://linuxize.com/post/how-to-add-swap-space-on-debian-9/
In the case of the Raspberry 4B, 2GB of memory is sufficient. There is no access to swap.
Installation of libraries
You need to update your system:apt-get update
apt-get upgrade
then add the following libraries:
apt install git cmake g++ libboost-all-dev libgmp-dev swig python3-numpy
python3-mako python3-sphinx python3-lxml doxygen libfftw3-dev
libsdl1.2-dev libgsl-dev libqwt-qt5-dev libqt5opengl5-dev python3-pyqt5
liblog4cpp5-dev libzmq3-dev python3-yaml python3-click python3-click-plugins
python3-zmq python3-scipy python3-gi python3-gi-cairo gir1.2-gtk-3.0
libcodec2-dev libgsm1-dev
Some of these libraries may already be available on your system.
apt install pybind11-dev python3-matplotlib libsndfile1-dev
python3-pip libsoapysdr-dev soapysdr-tools
pip install pygccxml
pip install pyqtgraph
VOLK Installation
VOLK is a library of kernels optimized for vector processing. It contains cores of hand-written SIMD (Single Instruction Multiple Data) code to optimize various mathematical operations. Its installation must be done before Gnu Radio.
Get into the folder ~/Downloads#
git clone --recursive https://github.com/gnuradio/volk.gitcd volkmkdir buildcd buildcmake -DCMAKE_BUILD_TYPE=Release -DPYTHON_EXECUTABLE=/usr/bin/python3 ../makemake testmake installldconfig
Installing Gnu Radio 3.9
Get into the folder ~/Downloads#
cdgit clone https://github.com/gnuradio/gnuradio.gitcd gnuradio
Force install version 3.9
git checkout maint-3.9mkdir buildcd buildcmake -DCMAKE_BUILD_TYPE=Release -DPYTHON_EXECUTABLE=/usr/bin/python3 ../
The compilation will take hours. We use 3 cores (-j3) out of the 4 available to save some power to monitor the process.
– make -j3
Then we run tests with probably some unimportant errors.
– make test
– make install
– ldconfig
At this stage, it is possible to optimize the treatment by running Volk or postponing it until later.
–volk_profile

For the Orange Pi, install LXTerminal
apt install lxterminalAdd to the configuration file /etc/gnuradio/conf.d/grc.conf or /usr/local/etc/gnuradio/conf.d/grc.conf dans la section [grc]
[grc]
xterm_executable = /usr/bin/lxterminal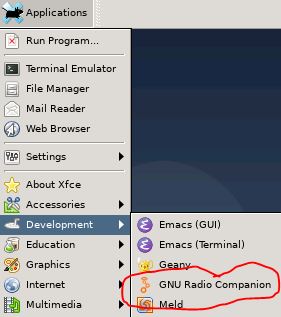
At this point, too, you can give GNU-Radio a try. Switch to graphical mode using VNC (e.g. use VNC Viewer for windows) if you are remote. Port 5901 for Orange Pi.
Launch ‘Gnu Radio Companion’, it’s a fantastic graphical tool for creating signal processing chains. Examples can be found in /usr/share/gnuradio/examples or /usr/local/share/gnuradio/examples/
Installing SDR Drivers
Depending on the SDR models you want to use, you must install the corresponding drivers or install them all to be universal. In addition, to facilitate interfacing with GNU-Radio, you need blocks like SoapySDR (neutral SDR support library) or Osmocom (Open source mobile communications).
Installation of the Soapysdr library
Install the following libraries:apt-get install libpython3-dev python3-numpy swig
Do not install version 0.8 of SopySDR, because the installation of additional libraries for SDRs only works with version 0.7
Don’t install git clone https://github.com/pothosware/SoapySDR.git
Go to the Tags folder on the SoapySDR github( https://github.com/pothosware/SoapySDR/tags ) and download the zip of soapy-sdr-07.2
Go to the SoapySDR folder.
mkdir build
cd build
cmake ..
make -j4
sudo make install
ldconfig
At this point, you can see which SDR drivers are detected with the command:SoapySDRUtil --info
You still can’t find any SDR model on the ‘Available factories’ line but check the search for drivers in the modules0.7 subfolder and not modules0.8
Installing drivers for RTL-SDR
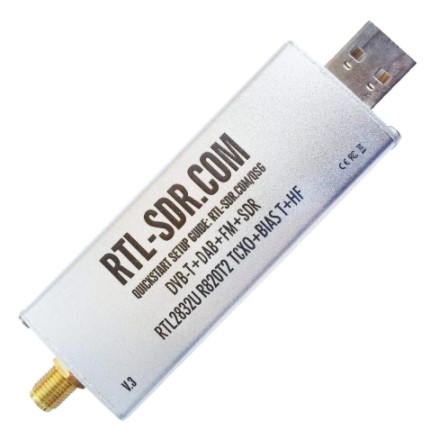
The best known SDR that is found under different brands is the RTL-SDR. The V3 version can even work below 28MHz with degraded performance.
Installing the USB Library and Compiler Tool:
apt-get install build-essential libusb-1.0-0-devapt-get install pkg-config
We clone rtl-sdr from Osmocom in the folder ~/Downloads# : git clone https://github.com/osmocom/rtl-sdr.git
Go to the rtl-sdr folder and chain the commands:
cd rtl-sdr
mkdir build
cd build
cmake ../ -DINSTALL_UDEV_RULES=ON -DDETACH_KERNEL_DRIVER=ON
make
make install
ldconfig
Install the development library:apt-get install rtl-sdr librtlsdr-dev
then clone to the Downloads folder:
git clone https://github.com/pothosware/SoapyRTLSDR.git
cd SoapyRTLSDR
mkdir build
cd build
cmake ..
make
make install
ldconfig
The command :SoapySDRUtil --find
allows you to list the SDRs connected to your Orange or Raspberry Pi card.
The command:SoapySDRUtil --probe="driver=rtlsdr"
gives all the details on the RTL-SDR connected via USB.
Similarly with an RTL-SDR on the USB port we get information by typing: rtl_eeprom
orrtl_eeprom -h
Installing drivers for HackRF One
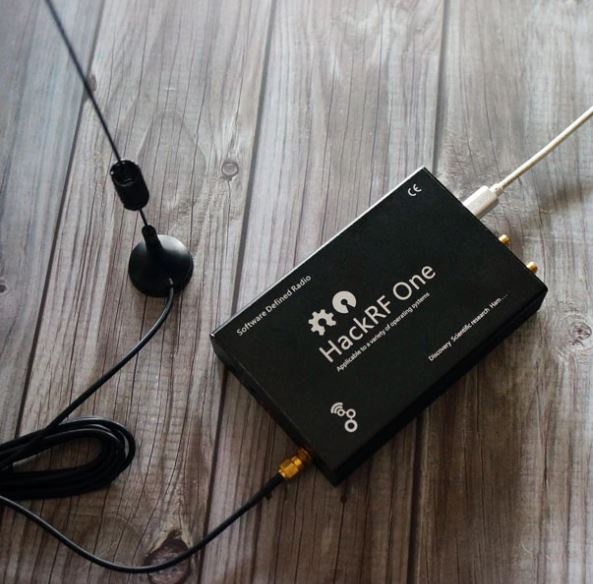
A first package allows the control of the HackRF One.
apt install hackrf
By plugging a HackRF One into the USB port of the Orange/Raspberry PI, you can check its presence by installing the hackrf package and typing in a terminal:hackrf_info
To interface with SoapySDR, go to the Downloads folder and type the following commands:apt-get install libhackrf-dev
git clone https://github.com/pothosware/SoapyHackRF.git
cd SoapyHackRF
mkdir build
cd build
cmake ..
make
sudo make install
ldconfig
For details on HackRF features, type in a terminal:
SoapySDRUtil --probe="driver=hackrf"Installing DRIVERS FOR Adalm-Pluto
The Adalm-Pluto is an interesting solution capable of working in Full-Duplex (simultaneous reception and transmission) in a frequency band between 325 MHz to 3.8 GHz. It is possible to extend the frequency range of the Pluto from 70MHz to 6GHz. This is described in the following article: https://f1atb.fr/index.php/2021/03/09/frequency-extension-of-pluto-sdr/
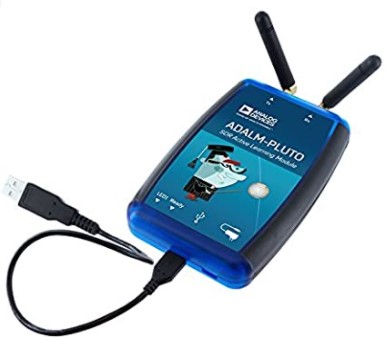
The Pluto interfaces via the USB port which behaves like an ethernet port. It should not be powered by the USB port of the Orange/raspberry Pi, because there are cuts in the connection. In addition, add an external 5V2A power supply. The Pluto has a micro USB input to power it.
Verify that the following modules are present with:
lsmod. They are absent with some versions of Armbian / Debian.
- cdc_acm,cdc_ether
- rndis_host
- rndis_wlan
- usbnet
If a module is missing type:
modprobe « nom du module »
modprobe adds the modules with their dependencies, so by adding for example cdc_ether, usbnet will also be added. After each installation do an lsmod to check.
With the orange pi zero 2, these modules are not all available on the Armbian os, but this does not seem to disturb the operation. Missing cdc_ether and usbnet. Likewise with the Rasopberry Pi 4, usbnet is missing.
As recommended on the Analog Device site, add to the folder
/etc/udev/rules.d/
lthe rules file: 53-adi-plutosdr-usb.rules given below. Done :
nano /etc/udev/rules.d/53-adi-plutosdr-usb.rules
# allow "plugdev" group read/write access to ADI PlutoSDR devices
# DFU Device
SUBSYSTEM=="usb", ATTRS{idVendor}=="0456", ATTRS{idProduct}=="b674", MODE="0664", GROUP="plugdev"
SUBSYSTEM=="usb", ATTRS{idVendor}=="2fa2", ATTRS{idProduct}=="5a32", MODE="0664", GROUP="plugdev"
# SDR Device
SUBSYSTEM=="usb", ATTRS{idVendor}=="0456", ATTRS{idProduct}=="b673", MODE="0664", GROUP="plugdev"
SUBSYSTEM=="usb", ATTRS{idVendor}=="2fa2", ATTRS{idProduct}=="5a02", MODE="0664", GROUP="plugdev"
# tell the ModemManager (part of the NetworkManager suite) that the device is not a modem,
# and don't send AT commands to it
SUBSYSTEM=="usb", ATTRS{idVendor}=="0456", ATTRS{idProduct}=="b673", ENV{ID_MM_DEVICE_IGNORE}="1"
SUBSYSTEM=="usb", ATTRS{idVendor}=="2fa2", ATTRS{idProduct}=="5a02", ENV{ID_MM_DEVICE_IGNORE}="1"
To make Adalm-Pluto work with GNU Radio, you need to install the following packages:
apt-get install gr-iioapt-get install libiio-utilsapt-get install gqrx-sdr
Once the installation is done you can check access to Pluto with the command:
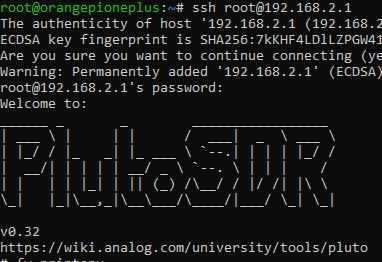
ssh root@192.168.2.1
The Pluto connects physically by USB, but is accessible by ssh via an IP address 192.168.2.1. The password is ‘analog’.
To remotely access the Pluto, you must add the paramiko package.apt-get install python3-paramiko

To test the interface with the Adalm-Pluto, verify that it is visible in the list of USB-connected devices by typing in a terminal: lsusb
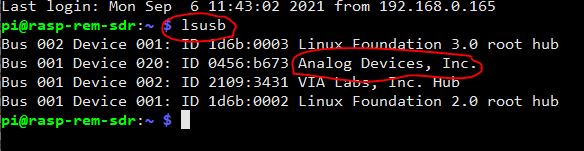
To interface with SoapySDR, install:apt install libiio-dev libad9361-dev libspdlog-dev python3-packaging
Go to the Downloads folder and type the following commands:git clone https://github.com/pothosware/SoapyPlutoSDR
cd SoapyPlutoSDR
mkdir build
cd build
cmake ..
make
sudo make install
ldconfig
To know all the details about an Adalm-Pluto connected via USB, type:SoapySDRUtil --probe="driver=plutosdr"
Installing DRIVERS FOR SDRPLAY: RSP1 and RSP1A
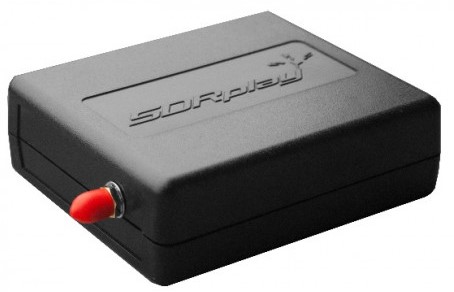
The SDRplay brand SDR family is interesting for covering the low HF radio amateur bands, not covered separately by the Pluto or partially by the RTL-SDR keys. In addition, they offer 12 or 14 bit dynamics. For less than 30€ in China, you can find equivalents to the RSP1.
You have to go to the sdrplay.com site and go to the pages dedicated to downloading.
For the Orange Pi Zero2, you must download the API v3
SDRplay_RSP_API-ARM64-3.07.1.run
With a chmod 755 SDR… command make the file executable then:sh SDRplay_RSP_API-ARM64-3.07.1.run
The 64-bit version of ‘Orange Pi Zero2 does not work for the Raspberry Pi4. This will be the 32 bit version SDRplay_RSP_API-ARM32-3.07.2.run. It offers an installation script in a zip.
Unzip everything and make the script executable, then:
sh 1installAPI.sh
Answer Y to the license then reboot the Orange/Raspberry Pi.
To interface with SoapySDR, go to the Downloads folder and type the following commands:git clone https://github.com/pothosware/SoapySDRPlay3
cd SoapySDRPlay3
mkdir build
cd build
cmake ..
make
make install
ldconfig
To know all the details about a SdrPlay connected via USB, type:SoapySDRUtil --probe="driver=sdrplay"
Arrive at this point, you have the whole list of SDRs addressable by SoapySDR with the command:SoapySDRUtil --info
Modification for RSP2
To date (September 2022), I do not have an RSP2. By taking remote control of an OM’s Raspberry PI4 with an RSP2, I was able to make Remote SDR work by modifying a variable in the GNU-RADIO application file /remsdr/PY/RX_SdrPlay_sanw_v5.grc. This is the name of the antenna.

I was not able to investigate deeply and verify all the system.
Serial Interface Installation for SA818
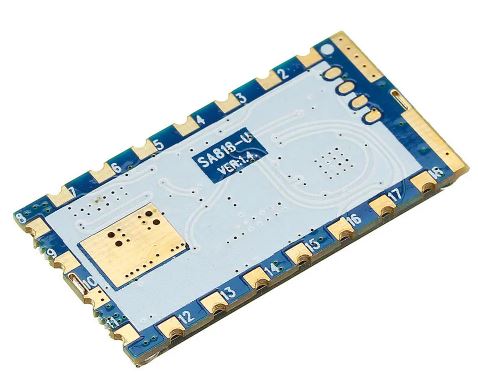
The SA818 module makes it possible to transmit in VHF or UHF in NBFM with a power of 1w. It is not an SDR but it is practical to make a small transmitter that can be controlled remotely by Remote SDR. It interfaces to the Orange Pi Zero 2 through the UART5 serial port and the ‘Line Out’ analog audio output. You need to install the serial port access python library:
pip3 install pyserial-asyncio
Install gr-osmocom block for Gnu Radio
Optional installation if you want to use Osmocom in Gnu Radio
To interface an SDR in Gnu Radio with Osmocom, you must install gr-osmocom. Go to the Downloads folder then the commands:git clone git://git.osmocom.org/gr-osmosdr
cd gr-osmosdr/
mkdir build
cd build/
cmake ../
Read the output of cmake carefully to identify which drivers were found and which were not. Correct if necessary.
######################################################
— # Gnuradio enabled components
— ######################################################
— * Python support
— * IQ File Source & Sink
— * Osmocom RTLSDR
— * RTLSDR TCP Client
— * HackRF & rad1o Badge
— * RFSPACE Receivers
— * SoapySDR support
— * Red Pitaya SDR
Pluto and SDRplay are not in the list. We will use SoapySDR to interface with the RSP1, RSP1A and Pluto.
Then start the compilation:make
make install
ldconfig
Now the Osmocom block appears in GNU-Radio Companion.
Install Remote SDR files
Copy the Remote SDR source files to the /remsdr folder but do not modify the existing folders and files following the installation of the above packages. Namely: node_modules, package-lock.json and package.json.
The same is true for the 2 security certificate files.
All the files needed to run Remote SDR should be installed in the /remsdr folder. At first to facilitate the transfer from the source downloaded on Github to the Orange/Raspberry Pi, it is better to give all permissions to the .chmod -R 777 /remsdr
Once everything is operational, access rights can be limited to what is strictly necessary.
Launching Remote SDR
If you are using an Adalm-Pluto, only one Orange PI Zero 2 or one Raspberry Pi4 is needed.
If you use a HackRF in transmission and a hackRF in reception you will need 2 Orange Pi Zero 2 with the same configuration or a single Raspberry Pi 4.
To launch the web server(s), go to the /remsdr folder and type:
node Radio_Server.jsFrom a client PC you connect to the Orange/Raspberry PI dedicated to the reception at the address:
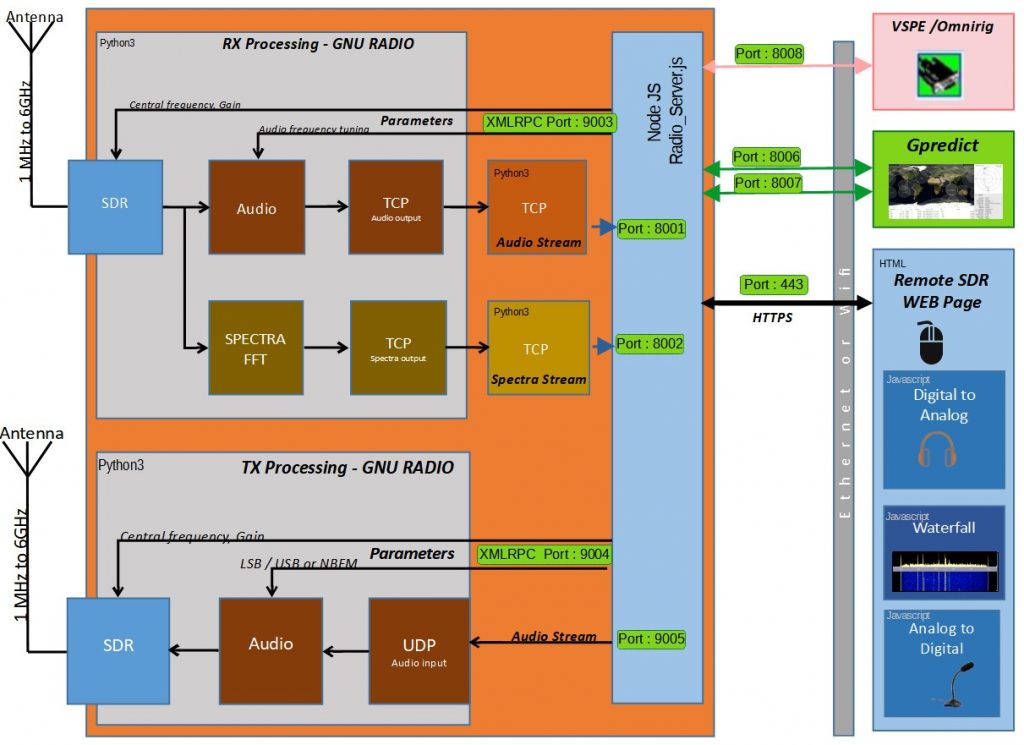
https://192.168.xx.xx
Note that the exchanges are done in https on the usual port 443. Everything is exchanged via this port. Ports 8001 to 8005 are used more like in previous versions of Remote SDR.
However, since version v3 of Remote SDR, it is possible to interface with Gpredict via port 8006 for the receiver and 8007 for the transmitter.
Since version v4.3 of Remote SDR, it is possible to interface with VSPE / Omnirig via port 8008 which allows dialogue with other software such as WSJT-X.
Launch at boot
For an automatic launch at boot of the Orange/Raspberry Pi, open the crontab file:
crontab -eAt the bottom of the page add the following line:
@reboot /usr/bin/node /remsdr/Radio_Server.jsNow, following a reboot, the “Radio_Server.js” server should start automatically.
Software architecture


Hi Andrew,
First of all I would like to thank you for the remote sdr application version 4.5 was working very well, I made a new SD card with version 5.0 I made all the settings I inserted the Access Key 1234 I configured the reception, but when I click on TX it turns red the audi appears on spectrum but I don’t have TX on Adalm Pluto.
There is something different besides settings RX and TX configuration, can you give me any tips to get TX back?
Thanks
Push the TX gain to the maximum.
If necessary, on Tools page, click on “Reset Local Storage in browser” and then re-enter the access key 1234
73
Hi Andre
I wonder what are the updayes in your 5.07 version of Remote SDR?
73
Nick
Version 5.07 (September 2022)
***********
– Debug log accessible from Tools page
– Page title equal to Transceiver name
– Small changes in header layout in full screen
– Changes on RX frequency setting via mouse or keyboard
– FM squelch improvement
I want try to install v5 to Odroid N2. Which ArmbianOS I must select? https://www.armbian.com/odroid-n2/
I think you can install Jimmy or Jimmy XFCE
As I understand need GUI version only distrib?
It’s possible modify the code to work in a Minix PC (8086-64) with Debian ??
It’s a very good platform to work, I install all, but the CPU and GPIO thrown an error as is normal.
Sorry, I cannot adapt the code to all platforms. Open the file /remsdr/remsdr_modules/CPU.js and remove all the GPIO accesses.
73
Thanks André.
I leave the PC for RX only, and works with some tricks.
The Pi4 are connected to a Pluto for a QO100 Setup, the RX are OK, but appears that TX sometimes are “slow” and distorted, and same appears for the TONES, the station is a remote setup in 2º qth.
Any ideas why distort ?? just finish a QSO in the QO100, go tools, return to SDR and no more good modulation….
73
First, you must work with version 5.07, the last one today. Update if necessary. Click on “Look for updates” until you obtain 5.07.
Now look to the receiver side to see if the quality of the Internet/Ethernet link is good.
The spectrum dot on the top left must be at regular distance.
The filling of the audio data in the buffer must be of small amplitude, with only few red lines. A red line correspond to lost of data or delays.
Preferably, use an ethernet cable to connect your system. Don’t use Wi-Fi which often doesn’t provide a regular transmission.
On Remote SDR, we cannot buffer a large amount of audio signal on RX and TX because it will impose a delay to switch from RX to TX or TX to RX.
Normally, bad audio corresponds to a non-regular communication on internet/Ethernet.
73
André
F1ATB
Hi André,
i try to build everything for my Odroid board. But i struggle with gr-iio.
How did you manage to build gr-iio for Gnuradio 3.9?
I get this grswig missing error and did not find a way around so far.
73 de Mario,DH5YM
Mario
I don’t remember suffering when building gr-iio. Ask Google. Sorry, I don’t know how to help you.
Ok. Unfortunately Google says 3.9 and gr-iio would not work and either upgrade to 3.10 or downgrade to 3.8. Would 3.10 work as well as a base for remotesdr?
In this case i would try that.
The webserver with the UI did already work on my Odroid but as expected no signal and red “LED” for the RX Status. Version Readout under tools via the soapy command did work.
73
Mario
I don’t remember what I did to build with gnuradio 3.9.. With gnuradio 3.10 I have not yet tested with remote sdr.
Your suggestion to upgrade the firmware of the Pluto to 0.35 has solved the issue to Feng a chinese OM. Thanks again.
André
I now got everything compiled with Gnuradio 3.8 but i dont get any audio or spectrum in the Browser and the RX LED stays red. Its neither working with Pluto nor with RTLSDR. I guess i made something terribly wrong. Is there any switch that will output some debug information on the STDOUT where the remotesdr is printing? So far i dont see any unusual.
SoapyUtil output is ok as far as i see. The gnuradio test was also ok.
Otherwise i have to give up and just buy a Raspi 😉
Have a nice weekend!
on the installation page https://f1atb.fr/index.php/2022/05/16/remote-sdr-v5-manual-installation/
Stop Radio_Server.js
as defined in the cron @reboot /usr/bin/node /remsdr/Radio_Server.js
Relaunch manually node Radio_Server.js
You will have debug message printed in the terminal
Hello
Thank you for this fabulous project.
I tried to image the sdr v5 image from the site for my RPi 4 but unfortunately the Pi won’t boot after sd card flashing. After trying twice with the RPi flasher, I’m guessing there must be an issue with the image(?)
I then proceeded to install Remote SDR manually on stock RPi Bullseye following the extensive guide. I’d like to use this with SDRPlay 1A, and have managed to get SoapySDR and sdrplay drivers installed, but unfortunately I get an error when attempting to run the below:
> node Radio_Server.js
node:internal/modules/cjs/loader:998
throw err;
^
Error: Cannot find module ‘/remsdr/Radio_Server.js’
at Function.Module._resolveFilename (node:internal/modules/cjs/loader:995:15)
at Function.Module._load (node:internal/modules/cjs/loader:841:27)
at Function.executeUserEntryPoint [as runMain] (node:internal/modules/run_main:81:12)
at node:internal/main/run_main_module:22:47 {
code: ‘MODULE_NOT_FOUND’,
requireStack: []
}
With the above error I’m guessing the Radio_Server.js is expected to be created by ourselves? If yes, is anyone able to share a copy please so I could test?
First, it’s strange that the RPI4 image is not working. A lot of OM did it with success. Change the SD card.
Radio_Server.js is the main program at the root of the Remsdr directory. No change is needed from you.
Many thanks for your prompt response André. It’s much appreciated.
I will try your suggestion to use a different SD Card for the pre-compiled image (Should’ve tried before the manual effort!!).
However, on the question of Radio_Server.js, that file is definitely not available under the /remsdr. These are the only files …
pi@remsdr:/remsdr $ ls -l
total 96
drwxrwxrwx 108 root root 4096 Feb 17 01:07 node_modules
-rwxrwxrwx 1 root root 312 Feb 16 17:18 package.json
-rwxrwxrwx 1 root root 80829 Feb 16 17:18 package-lock.json
-rwxrwxrwx 1 root root 2049 Feb 16 17:19 selfsigned.crt
-rwxrwxrwx 1 root root 3272 Feb 16 17:18 selfsigned.key
pi@remsdr:/remsdr $
I have checked other directories too. I have followed the instructions above to the letter so can assure that I haven’t missed any steps.
Any help in getting a copy of Radio_Server.js file would be deeply appreciated! 🙂
Kind regards
Remsdr Source 5.02is available on Github / F1ATB and on the image too. I send you directly by mail the source.
Thank you, I’ve responded with the errors I’m getting.
Nevertheless I won’t be progressing any further with the manual installation, far too many hiccups.
To clarify my previous comment about the Image installation, I can confirm that the image does NOT work for me. Having extracted the img file from .7z file with 7-Zip, I’ve tried three SD cards, and used Win32 Disk Imager and also Raspberry Pi’s own Imager. None of these work so its not the SD card. I’ve tried imaging stock RPi Bullseye image and they work flawlessly. I suspect an issue with the image… sorry!
Has anyone actually tried the writing the image to an SD card and tried?
This last night, I did the complete process. I downloaded the image for Raspberry 4 remsdr_v5.0_rpi4.img.7z from Github https://github.com/F1ATB/Remote-SDR/releases/tag/v5.0i_rpi4. I extracted the file with 7-zip. I used the Raspberry Pi imager. I installed the 16 GB SD card on a Raspberry Pi 4 with 2Gb of memory. I switched on and waited 1 or 2mn until the expand process to fill the complete SD card was finished. I entered the RPI4, IP address in my Browser and Remote SDR started perfectly.
For me, I think your issue is due to a corrupted image file downloaded from Github. On my side I had to do the process 2 times as the first SD card didn’t work.
I hope you will succeed.
Regards
André
Hi VK,
I have a similar issue, but this is because I made a mistake during manual installation.
I solved my issue by installing the Remote SDR application on /remsdr , cd to /remsdr and then installing all node packages (npm install ) as described in the manual installation guide.
I hope this helps.
MC
Hi André,
my setup has only a hackrf that I would like to used for RX. TX IP is selected to the same IP than RX but I haven’t allowed TX in the settings (Access Key is empty).
My HackRF is well recognised.
My configuration seems to be correct but on the Reote SDR web application SDR RX On never goes Green.
Here below you can see Remote SDR log from the initialisation with some different attempts to start RX:
#############################################
18:59:16 : Start Server on port 80 in http and port 443 in https.
19:7:16 : xybga> ms : 1467 | RXsocket.connected
19:7:16 : xybga> ms : 1467 | Define IP adresses
19:7:18 : xybga> ms : 90 | RXsocket.connected
19:7:18 : xybga> ms : 90 | Define IP adresses
19:8:3 : xybga> ms : 52 | RXsocket.connected
19:8:3 : xybga> ms : 53 | Define IP adresses
19:8:3 : xybga> ms : 53 | RXsocket.io connected
19:8:3 : CPU> Launch RX: hackrf, RxSampRate: 2000000
19:8:3 : CPU> Launch TX: none, TxSampRate: 0
19:8:3 : xybga> ms : 270 | TX ready:false TX SDR:none
19:8:3 : xybga> ms : 299 | RX configuration received
19:8:3 : xybga> ms : 318 | TX configuration received
19:8:4 : xybga> ms : 334 | Valide Local_Storage true
19:8:4 : xybga> ms : 334 | Recall Rx parameters
19:8:4 : xybga> ms : 337 | Recall_SDR_Para()
19:8:4 : xybga> ms : 339 | Init Sliders
19:8:4 : xybga> ms : 368 | Init_Page_RX()
19:8:4 : xybga> ms : 369 | RX parameters init
19:8:4 : xybga> ms : 371 | Init_Page_TX()
19:8:4 : xybga> ms : 379 | TX Start New Mode
19:8:4 : CPU> connected to RX Spectra server!
19:8:4 : CPU> connected to RX Audio server!
19:8:29 : xybga> ms : 100 | RXsocket.connected
19:8:29 : xybga> ms : 100 | Define IP adresses
19:8:54 : xybga> ms : 100 | RXsocket.connected
19:8:54 : xybga> ms : 100 | Define IP adresses
19:9:5 : xybga> ms : 31 | RXsocket.connected
19:9:5 : xybga> ms : 31 | Define IP adresses
19:9:5 : xybga> ms : 31 | RXsocket.io connected
19:9:5 : CPU> Launch TX: none, TxSampRate: 0
19:9:5 : xybga> ms : 195 | RX configuration received
19:9:5 : xybga> ms : 198 | TX ready:false TX SDR:none
19:9:5 : xybga> ms : 205 | TX configuration received
19:9:5 : xybga> ms : 220 | Valide Local_Storage true
19:9:5 : xybga> ms : 220 | Recall Rx parameters
19:9:5 : xybga> ms : 224 | Recall_SDR_Para()
19:9:5 : xybga> ms : 225 | Init Sliders
19:9:5 : xybga> ms : 253 | Init_Page_RX()
19:9:5 : xybga> ms : 255 | RX parameters init
19:9:5 : CPU> connected to RX Spectra server!
19:9:5 : CPU> connected to RX Audio server!
19:9:5 : xybga> ms : 256 | Init_Page_TX()
19:9:5 : xybga> ms : 263 | TX Start New Mode
19:9:34 : xybga> ms : 30 | RXsocket.connected
19:9:34 : xybga> ms : 31 | Define IP adresses
19:9:34 : xybga> ms : 31 | RXsocket.io connected
19:9:34 : CPU> Launch TX: none, TxSampRate: 0
19:9:34 : xybga> ms : 191 | TX ready:false TX SDR:none
19:9:34 : xybga> ms : 217 | RX configuration received
19:9:34 : xybga> ms : 227 | TX configuration received
19:9:34 : CPU> connected to RX Spectra server!
19:9:34 : xybga> ms : 241 | Valide Local_Storage true
19:9:34 : xybga> ms : 241 | Recall Rx parameters
19:9:34 : xybga> ms : 244 | Recall_SDR_Para()
19:9:34 : xybga> ms : 245 | Init Sliders
19:9:34 : xybga> ms : 272 | Init_Page_RX()
19:9:34 : xybga> ms : 273 | RX parameters init
19:9:34 : xybga> ms : 275 | Init_Page_TX()
19:9:34 : CPU> connected to RX Audio server!
19:9:34 : xybga> ms : 282 | TX Start New Mode
19:9:42 : xybga> ms : 94 | RXsocket.connected
19:9:42 : xybga> ms : 95 | Define IP adresses
19:10:54 : xybga> ms : 477 | RXsocket.connected
19:10:54 : xybga> ms : 477 | Define IP adresses
19:10:55 : CPU> Kill RX: hackrf
19:10:55 : xybga> ms : 59 | RXsocket.connected
19:10:55 : xybga> ms : 59 | Define IP adresses
19:10:55 : xybga> ms : 59 | RXsocket.io connected
19:10:55 : CPU> Launch RX: hackrf, RxSampRate: 2000000
19:10:55 : CPU> Launch TX: none, TxSampRate: 0
19:10:55 : xybga> ms : 340 | TX ready:false TX SDR:none
19:10:55 : xybga> ms : 364 | RX configuration received
19:10:55 : xybga> ms : 373 | TX configuration received
19:10:56 : xybga> ms : 387 | Valide Local_Storage true
19:10:56 : xybga> ms : 387 | Recall Rx parameters
19:10:56 : xybga> ms : 389 | Recall_SDR_Para()
19:10:56 : xybga> ms : 390 | Init Sliders
19:10:56 : xybga> ms : 417 | Init_Page_RX()
19:10:56 : xybga> ms : 418 | RX parameters init
19:10:56 : xybga> ms : 419 | Init_Page_TX()
19:10:56 : xybga> ms : 426 | TX Start New Mode
19:10:56 : CPU> connected to RX Spectra server!
19:10:56 : CPU> connected to RX Audio server!
19:13:8 : xybga> ms : 433 | RXsocket.connected
19:13:8 : xybga> ms : 433 | Define IP adresses
19:13:9 : xybga> ms : 32 | RXsocket.connected
19:13:9 : xybga> ms : 33 | Define IP adresses
19:13:10 : CPU> Launch TX: none, TxSampRate: 0
19:13:10 : xybga> ms : 421 | TX ready:false TX SDR:none
19:16:12 : xybga> ms : 460 | RXsocket.connected
19:16:12 : xybga> ms : 460 | Define IP adresses
19:16:13 : xybga> ms : 91 | RXsocket.connected
19:16:13 : xybga> ms : 92 | Define IP adresses
#############################################################
However If I set the Access Key to allow to transmit, SDR TX On goes to Green and I can perform
Do you have an idea why RX is not activated by the Remote SDR application?
Thanks in advance.
First test in Tools that the HackRf ins responding
“A poor quality power supply. Change power supply for your processor and Hack RF. Differences are visible between an output at 5v or rather 5v3.
The quality of the USB cable. The flow being important, there can be cuts with badly shielded cables. Try other cables.”
Second
Go to the “Tools” page and select “Reset Local Storage in browser” at the bottom of the page. This resets all initial settings and avoids configuration conflicts. Also it is necessary to force the reloading of all the files by the browser. Press CTL-F5 repeatedly.
Three. Restart the processing.
To restart the processing at the Raspberry / Orange Pi level, leave the “remote_sdr.html” page, go to the home page with the penguin, wait at least 3s for the processing to stop, then return to the “remote_sdr.html” page. This only stops processing if only one person is connected to the receiver.
Bonjour!
Est-il possible d’installer ce projet sur Orange Pi 3 (sans Zero) ? De source.
Quelqu’un a-t-il vécu une telle expérience ?
Cela devrait fonctionner mais il faut suivre la procédure d’installation manuelle. Aucune image n’existe.
F1ATB
Merci André!
J’essaie de faire une construction manuelle.
Merci André pour le logiciel.
One comment on using a Raspi 4B.I have. I had to adjust the code in CPU.js. I have the program running on 64-bit but the GPIO pins now do not gtet set properly. I found Ijust could hardcode GPIO_Fan and GPIO_Oscil fixed the problem.
Again, many thanks for the software. Si jamais vous avez besoin d’assistance avec les traductions, faites-moi signe.
Hello André,
Is it possible to use your sdr software for microwave dx in half duplex applications RX and the TX on same frequency? Amateur bands of interest are
2403.150, 3398.150, 5760.150 and 10,369.150 (SSB)
You need two HackRF and you are limited to 6GHz max. It will work in full duplex.
73
André
André!
Thank you very, very much for the RemoteSDR project! It’s very nice and working fine. My setup is RPi 4 and Adalm Pluto, and I have used the RPi image. My main interest is HF, and the Adalm Pluto does not work at these frequencies. But I have a very good friend, and has made a transverter. The HF is mixed up to 303 to 355MHz and TX is mixed down from 303 to 355MHz to 3-55MHz. I’s working great! I have had some small problems, and I’m not sure what is failing. The Rx LED sometimes turns red and the spectrum freeze and of cource no audio. I have tried to reboot both RPi and Adalm Pluto from the Tools menu, but it seems to me that the only solution is to repower it all. The Adalm Pluto gets its power from the RPi USB contact, but I use both Adalm Plutos connected to the USBs on the RPi. I will try to change to a direct supply for the Pluto and see if that helps.
I have made the external encoder (vfo dial) also. With this I have some smaller problems. I have looked at the signals out of the unit and if I turn the encoder fast, I get more than D1..D1..D1 or U1..U1…U1, sometimes I get a “big number” like D16. I think you have tried to make a unit taking care of “D1 overflowing” with too many serial commands, and rather tell the RemoteSDR to decrease or increase a bigger step. I can see this on the RemoteSDR too, the frequency “jumps”. But sometimes this jump is very big and the frequency scale is getting far off. Have I understood things right that D1 or U1 means decrease or increase the frequency by 10Hz, and D2/U2 is 20Hz up or down? I changed the Arduino program to send only U2 or D2 instead of sending U1/D1, but the steps are much bigger then 20Hz. Can you please give me some information about this?
I have also noticed if I use the dial and changes frequency above or below the frequency shown on the frequency scale in RemoteSDR, strange things happens.
Then, I have a question on the “iFrame”. I’m not familiar with these things, but as I have understood it, with the “iFrame” you can show another webpage inside the page shown in a browser. In the configuration sheet, it’s possible to add new tabs thogether with “Memories” and “HF Propagation” tabs. I have tried to add simple webpages, but without luck. I get the new tab with my text, but the “window” is shown. I have noticed that scrollbar might show up, but nothing shown. I suppose the “HF Porpagation” is taken from an URL hardcoded in the RemoteSDR.
One last question, I have seen some updates for the OPi image, will there be any update for the RPi 4? I have ordered an OPi, but mail from the far east is snailmail at the moment 🙂
The HF tranverter is at the prototype state, but if you want, I can mail you circuit diagrams you can publish. There are still a lot to be done, but I want the output level of the transverter to be about +20 to +24dBm and the feed this to a power amplifier with 20dB gain to get about 25W output. I will be using an external PA ( an old PA from a Kenwood TS-120V) with a filter unit. I also plan to have internal switchin between HF and VHU/UHF/SHF.
This was a lot of questions and comments, and I hope you will kind and answer them, thanks in advance.
Best regards
Karl – LA3FY
The Adalm Pluto often has issues with the power supply. You need to find a good one.
For the external encoder, I see you perfectly understand how it works. May be change the delay between each reading. It corresponds to ms . May be some pulses are lost with a Delay=10
Preferably, use the RPI4. You can update from version 5.0 to the last version 5.08 online.
An Iframe is a zone to implement a web page in a web page. Typiclly an external site in your local page.
Regards
Thank you! The update function workes like a dream! I have clicked this button in the Tools menu a couple of times, and suddenly the udating started! Thank’s this was an easy match!
Getting the 5.0.8 version solves some of the “problems”, but there are still some “rarities”. I have been using the tuning unit to adjust the frequency. When tuning “up” in frequency, the tuning stops at the upper limit of the shown frequency scale. When tuning down in frequency, and reaching the lower limit in the frequency scale, then the “Central Freq” control starts moving down, and everyting goes “bananas”. I suppose this is a bug, and I hope this will be corrected in the next update! 🙂
Then another “bug”. As said, I use an external tuning unit control wit the Arduino Nano and an encoder. The variable called “total” must be “volatile” and the declaration line should be “volatile int total=0;”. If not “volatile” the values returned from the interrupt routine might be incorrect. I have observed this, as the tuning sometimes makes some very strange steps when tuning!
One thing more…
If “Link RX/TX freq” is checked, the Tx will not follow the Rx frequency when you have a band change, perhaps not a bug, but it would be nice to have the Tx following Rx under these circumstances too.
Best regards
Karl – LA3FY
OK for the volatile variable.
Which web browser are you using? Recently after some update in chrome, the TX function is no more working.
73
F1ATB
I’m using Chrome, version120.0.6099.217 will be installed when I restart Chrome, and this is not done yet…
Karl
Any progress with this: “Recently after some update in chrome, the TX function is no more working.” I have also tried Edge, but the Tx audio does not work there either… :-((((
I have to redesign Remote SDR to include all recent changes in Node.js, GNU Radio, Raspberry OS and browsers.
It’s a huge work. I will do it.
73
Karl,
I have the same issue. Edge use the same core that Chrome.
I’ve fixed the TX issue with rolling back Chrome to 104 version (ether 32 or 64b) and following method 1 in
https://www.browserstack.com/guide/downgrade-to-older-versions-of-chrome
With Group Policy, it is possible to disable Chrome updates.
I’m using Firefox for others browsings.
73′ F4BSP
Thanks, I have solved it by just renaming a folder! There are a lot of descriptions on the net, and I tried different. All of them ended up with an update. I have to use a dedicated PC for RemoteSDR, as I didn’t want to downgrade the one I use every day. Here is what I did:
Downloaded version 120.x.x.x (December 2023)
Deinstalled the version not working
Disconnected from Internet
Installed version 120….
Disabled the two services (gupdate and gupdatem)
Renamed the folder C.\programfiles(x86)\Google\Update to …\OldUpdate (or what you want)
Then Chrome will not update.
By the way, this was at least valid for Windows 10
73’s de Karl – LA3FY