Switching to https to encrypt data between a server and a client may be required to benefit from features such as accessing your PC’s microphone. Self-signing is easier to implement and is sufficient for an application on its intranet. This is the case with RemoteSDR to remotely control a transceiver. The starting base is an apache2 web server already installed on your system as described here:
https://f1atb.fr/web-server-on-orange-pi/
Open SSL must be installed to generate the certificates. It is found base on Armbian.
Open SSL installation
apt-get install openssl
Generating a private key
Go to the / etc / apache2 folder where you will put the certificates.
cd /etc/apache2
We start by saving a password to remember it at each renewal in a text file for example: certificate_pass.txt
nano certificat_pass.txt
Once the password is saved, generate the encrypted key.
openssl genrsa -aes256 -out certificat.key 4096
Use the previously saved password.
Rename the key:
mv certificat.key certificat.key.lock
Regenerate this key but in unlocked.
openssl rsa -in certificat.key.lock -out certificat.key
Thus we have a locked and unlocked key.
Generating the signature request
This file will be used for self-signing.
openssl req -new -key certificat.key.lock -out certificat.csr
Answer the questions by putting a ‘. ‘not to bother, except for the Common Name in which you will put localhost.
We now have a certificate.csr file
Auto Signing
openssl x509 -req -days 365 -in certificat.csr -signkey certificat.key.lock -out certificat.crt
Activate ssl mode on apache.
a2enmod ssl
Relaunch apache.
service apache2 restart
To check the configuration of apache.
apache2ctl configtest
Don’t forget to enable your site:
a2ensite default-ssl.conf
Add a permanent exception in Chrome
As part of regular access to your site, it is preferable to add a permanent exception to allow Google Chrome to display the content of the site without a security message. You will have to download the certificate of the self-signed site and add it to the list of local certificates.

Right click on the padlock with the red cross in the address bar.

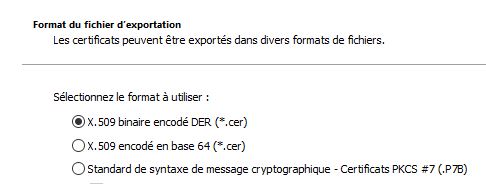
Save the certificate with the file name of your choice.
In Chrome you must now import the certificate. Type in the address bar:
chrome://settings
In the advanced settings, look for security and ssl settings. Click on Manage certificates and import the previously saved certificate.
Exit Chrome completely, triple dot at the top right and click on Exit. Now you can access your intranet site without getting a security warning message.
