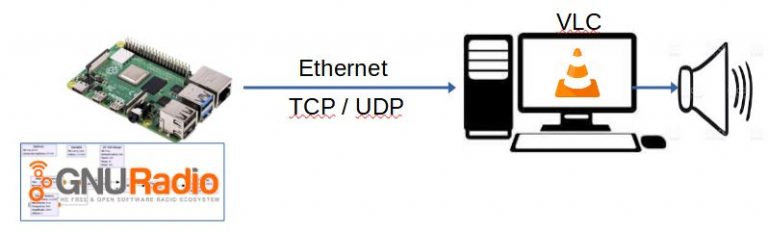
GNU-RADIO Audio to VLC
For tests with GNU-Radio it may be interesting to have an audio output streamed to a PC or a MAC on the network. The solution proposed here is easy to implement provided you know the syntax of the commands.
GNU-Radio synoptic
For this test we use an adjustable frequency sine wave generator and we will test 2 methods of sending (streaming) to a remote PC broadcasting the signal with VLC.
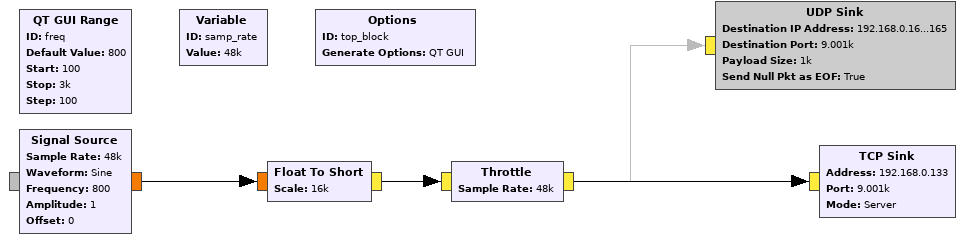
For this example the sample rate at GNU-Radio is 48000Hz. This is a standard value for quality audio, but we could limit ourselves to 10kHz to limit the bitrate knowing that our audio generator does not exceed 3kHz. At the output of the generator providing values between +1 and -1, the Float format is cropped to a signed 16-bit integer (cropping coefficient 16000). A Throttle function is used to adjust the output flow. At output two TCP Sink and UDP Sink blocks allow transmission in TCP or UDP to VLC
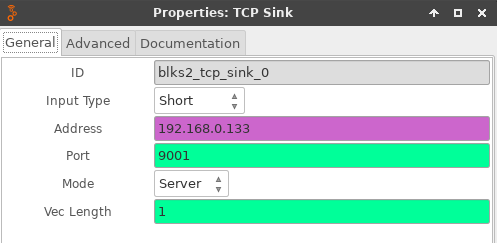
In the case of a TCP output, enter the IP address of the machine on which GNU-Radio is running. Put a port, for example 9001 and choose the server mode. In TCP, when machine A sends data to machine B, machine B is notified, checks the integrity of the data and requests them again if necessary. This makes the connection reliable at the expense of the higher speed.
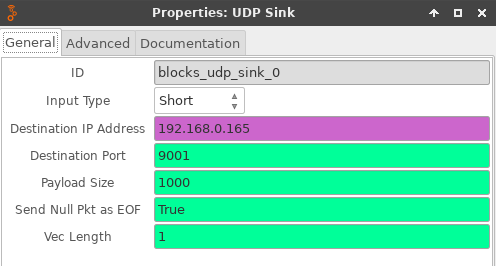
In the case of a UDP output, enter the IP address of the machine for which the data is intended. Put a payload size of 1000, the base 1472 gives an eratic behavior. Put a destination port like 9001. In UDP, when machine A sends packets to machine B, this flow is unidirectional. Data transmission is done without notifying the recipient (machine B), and the recipient receives the data without acknowledging receipt to the sender (machine A). This is less reliable, but convenient for streaming audio where loss of a message is not catastrophic.
To try it out you can download and unzip the source .grc file. https://f1atb.fr/wp-content/uploads/2021/03/test_audio_sink-1.zip. You choose (enable / disable parameter) the TCP or UDP output.
Playback by VLC
Using TCP protocol, it is necessary to start the GNU-Radio TCP server before starting VNC.
If you are on Windows, switch to command mode (cmd) and go to the folder where VNC is located. Usually C: \Program Files\VideoLAN\VNC. Type the following command:
vlc --demux=rawaud --rawaud-channels=1 --rawaud-samplerate=11025 tcp://192.168.0.133:9001
We find the following parameters:
- rawaud because the 16-bit audio is not compressed
- channels = 1 because we are in monophony
- samplerate: here 11025, but we can put something else depending on the output bitrate of GNU Radio
- tcp: // xxxxx: port this corresponds to the IP address on your network of the GNU-Radio side server and the chosen port.
At this point, you should hear the Audio generator whose frequency is controlled by a slider. This will allow you to see the delay of about 1 s between each change in frequency at the slider and the change in pitch.
If you opt for the UDP mode which is more suitable for streaming, the command to launch VLC is similar except for IP addressing.
vlc --demux=rawaud --rawaud-channels=1 --rawaud-samplerate=48000 udp://@:9001
This method is useful for quickly testing the output of a radio receiver modeled on GNU-Radio or any other application running on a “Single Board Computer” such as a Raspberry Pi or Orange Pi.
Other Posts on GNU-Radio
- SDR Pluto Frequency Update
- Launch GNU Radio script at boot
- NBFM Transceiver with Pluto SDR and GNU Radio
- GNU-RADIO Audio to VLC
- Remote SDR V1 – Setup
- HackRF – RTL-SDR – GNU RADIO Setup
- Web Client to GNU Radio
- GNU Radio to Web client
- Remote SSB Transmitter
- Remote SSB Receiver
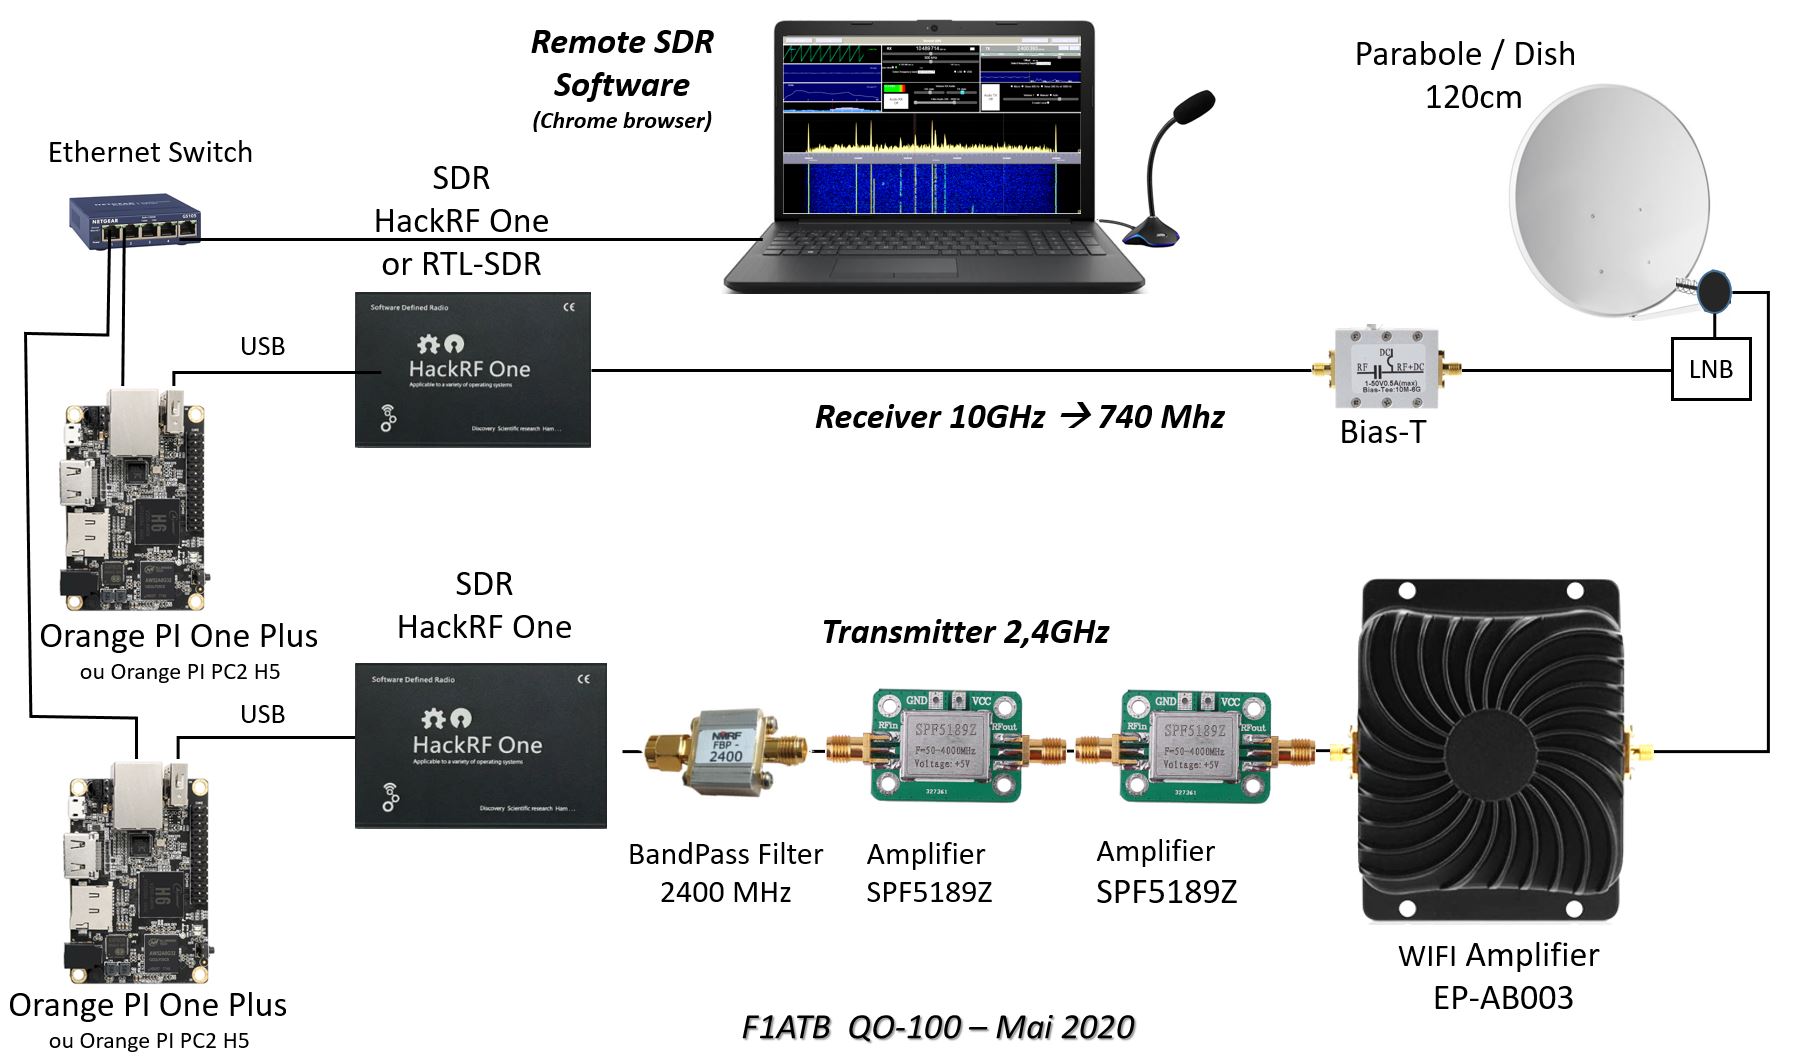
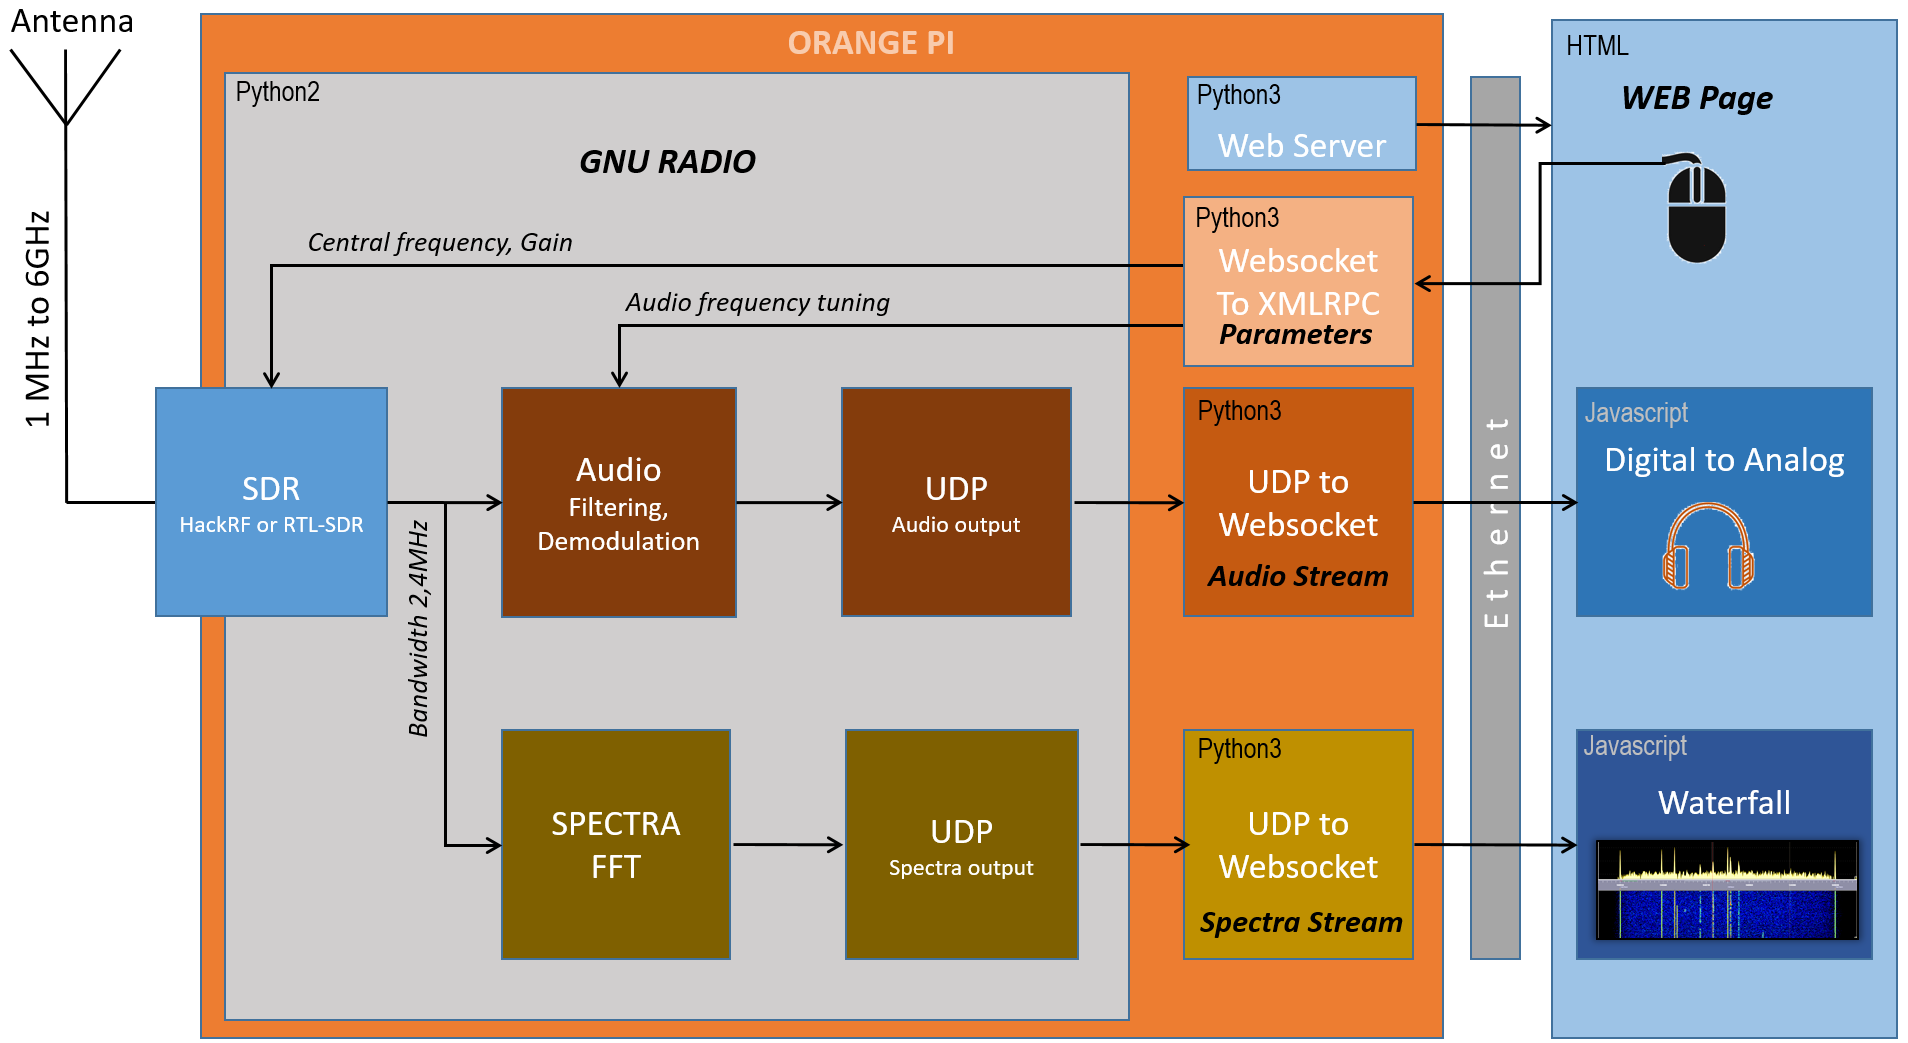
- Q0-100 Transceiver with 2 SDR – Remote SDR V1


Recent Comments