Remote SDR v4 – Manual Installation
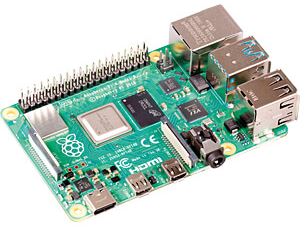
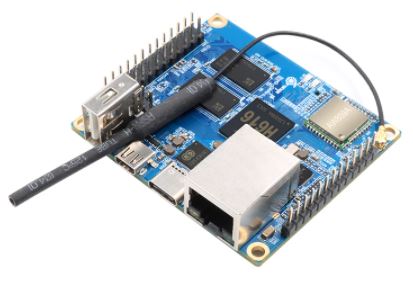
Below is the detailed procedure to install Remote SDR version 4 on a Raspberry Pi 4 B (2GB) or an Orange Pi Zero 2. It is adaptable for other ‘Single Board Computer’ cards if they have the necessary computing power, like the Orange Pi One Plus.
Sources are available on Github
https://github.com/F1ATB/Remote-SDR
This version 4 of Remote SDR is built around the OS Armbian (Bullseye) for the Orange Pi Zero 2 and Raspberry OS (Bullseye) for the Raspberry 4B. GNU Radio for the signal processing is now 3.8.
Remote SDR V4 – Evolutions
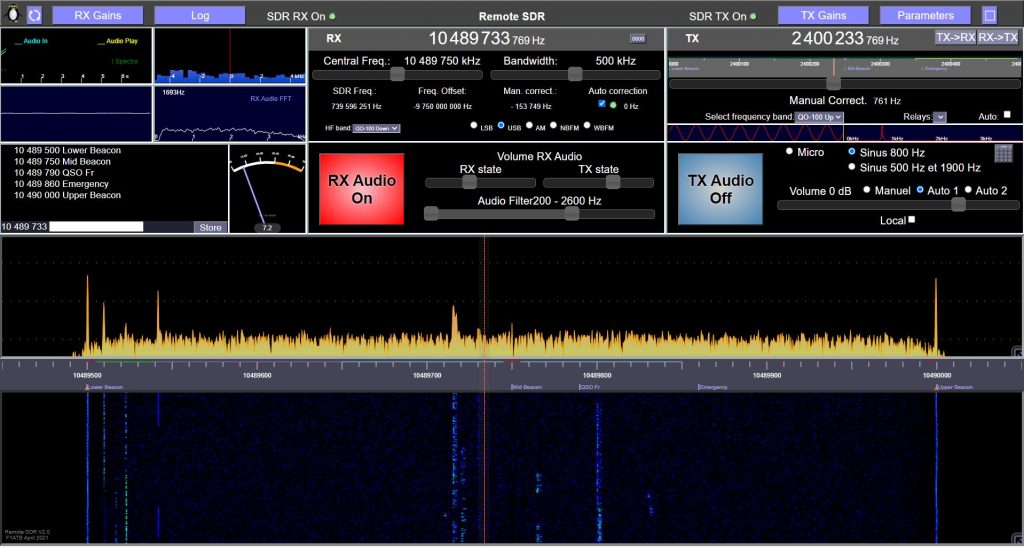
Remote SDR is an application allowing remote control from a web browser, a radio transceiver based around 1 or 2 SDR (Software Design Radio). See the presentation here:
https://f1atb.fr/index.php/fr/2021/05/03/remote-sdr-v2/
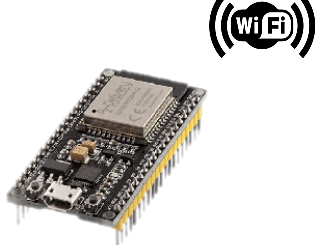
The Orange Pi Zero 2 is a ‘Single Board Computer’ card which, thanks to a 4-core 64-bit processor, provides the computing power necessary for signal processing at a cost of less than 40 €. Remote SDR also runs on a Raspberry Pi 4B with 2GB of memory or more. The main features provided by this new version of Remote SDR are:
- Processing of SDRs:
- Adalm-Pluto,
- HackRF One,
- RTL-SDR,
- SA818 transmitter module in NBFM
- Reception in SSB, NBFM, WBFM and AM,
- Emission in NBFM or SSB with Pluto or HackRF One,
- Reception spectrum on 2048 FFT points up to 2 MHz band,
- Interfacing with Gpredict to compensate the Doppler of low orbit satellites,
- Supply of system and SDR observation tools
Linux System Installation
Before installing the radio signal processing, the basic operating system must be installed. The procedure is detailed here:

Téléchargez le système d’exploitation Linux pour processeurs ARM , Armbian Bullseye (Octobre 2021) sur armbian.com pour l’Orange pi zero 2 et le charger sur une carte microSD.
Obtain the IP address and connect in SSH. The detailed procedure to install the system and an Apache server can be found here:

The Raspberry Pi OS version in Bullseye version is now available here. Select the version with desktop only.
- Install Apache as explained in the procedure above for the Orange Pi Zero 2
- Make a raspi-config in a terminal or go to the settings to activate SSH access and VNC access.
- Configure Samba if you want to access files from your Windows PC rather than SSH.
For all the commands to follow, I prefer to work directly as root. Done in terminal one:
sudo suAt this point you should have a full operating system with a web server on port 80 which you can access at http: //<ip address>
GNU Radio Companion installation
GNU Radio is a very powerful tool for modeling signal processing chains. GNU Radio Companion is a complementary tool allowing to build radio processing chains graphically without writing a line of code. At this time for Debian Bullseye version 3.8 is considered stable.
apt-get install gnuradio
Pour les Orange Pi, installez LXTerminal
apt install lxterminal
Add to the configuration file /etc/gnuradio/conf.d/grc.conf in the [grc] section
[grc]
xterm_executable = /usr/bin/lxterminal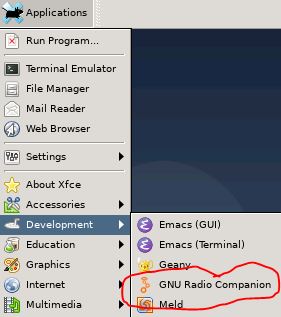
Switch to graphics mode using VNC (extension in chrome or TightVNC) if you are remote. Port 5901 for Oranges Pi.
Launch ‘Gnu Radio Companion’ if you want to find out. It is a fantastic graphical tool for creating signal processing chains. Examples can be found in the / usr / share / gnuradio / examples folder.
Websockets Installation
For python 3, you must add the websockets library which allows exchanges with the web browser. We install the pip installer, setuptools and websockets with the following commands:
apt install python3-pip
apt-get install python3-setuptools
pip3 install wheel
pip3 install websockets
Some of these applications may already be available on your system.
Installation of SDR drivers
Depending on the SDR models you want to use, you have to install the corresponding driver or install all of them to be universal.
Osmocom SDR and RTL-SDR Driver installation
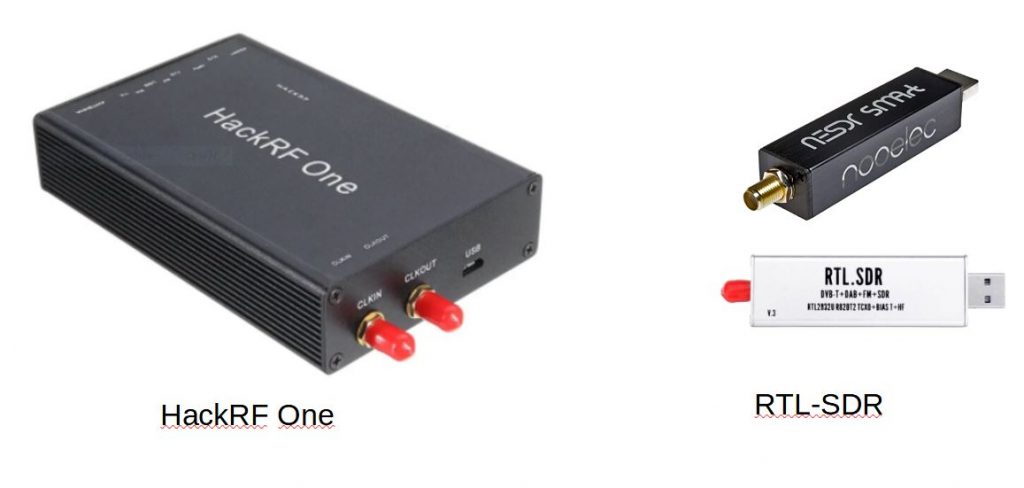
To interface Gnu Radio with an SDR such as Hack RF One or one of the many RTL-SDRs, the Osmocom module must be installed. As a reminder, HackRF covers from 1 MHz to 6 GHz in transmission or reception with an 8-bit dynamic encoding. RTL-SDR depending on the model, covers approximately 30 MHz to 1.7 GHz in reception only with 8-bit coding. It is a very interesting low cost SDR.
Installation of the USB library and the compilation tool:
apt-get install cmake build-essential libusb-1.0-0-dev
apt-get install pkg-config
We clone Osmocom in the Downloads folder of the root user or the / home / pi / Downloads folder for Raspberries:
cd /home/USER/Downloads ou cd /home/pi/Downloads
git clone https://github.com/osmocom/rtl-sdr.git
Go to the rtl-sdr folder and execute the commands:
cd rtl-sdr
mkdir build
cd build
cmake ../ -DINSTALL_UDEV_RULES=ON -DDETACH_KERNEL_DRIVER=ON
make
make install
ldconfig
Installation of the Osmocom source module
apt-get install gr-osmosdr
Now the Osmocom module must be present in the list of processing blocks of ‘GNU Radio Companion’. It is possible to do signal processing on data from hackRF One or RTL-SDR.
By plugging a HackRF One into the USB port of the Orange / Raspberry PI, you can check its presence by installing the hackrf package and typing in a terminal:
apt install hackrf
hackrf_info
With an RTL-SDR on the USB port, you have information by typing:
rtl_eeprom
or
rtl_eeprom -h
Adalm-Pluto interface installation
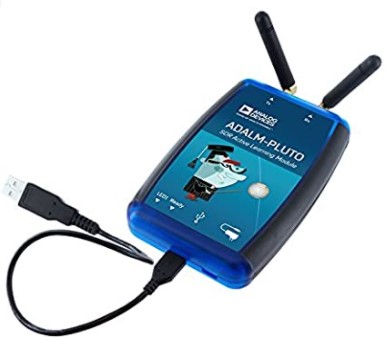
The Adalm-Pluto is an interesting solution, capable of working in Full-Duplex (simultaneous reception and transmission) in a frequency band between 325 MHz to 3.8 GHz. It is possible to extend the frequency range of Pluto from 70MHz to 6GHz. This is described in the following article : https://f1atb.fr/index.php/2021/03/09/frequency-extension-of-pluto-sdr/
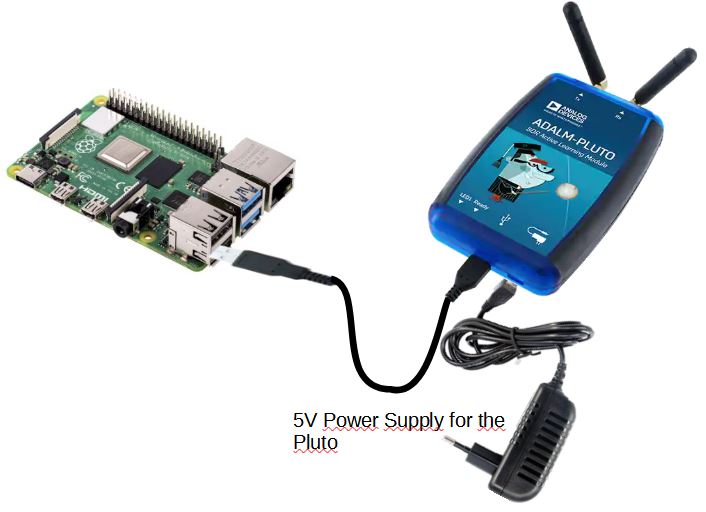
The Pluto interfaces through the USB port which behaves like an ethernet port. It should not be powered from the Orange / Raspberry Pi’s USB port, as there are breaks in the link. In addition add an external 5V2A power supply. The Pluto has a micro USB input to power it.
Check that the following modules are present with:
lsmod.
They are missing with some versions of Armbian / Debian.
- cdc_acm,cdc_ether
- rndis_host
- rndis_wlan
- usbnet
If a module is missing type:
modprobe « name of the module »
modprobe adds the modules with their dependencies, so by adding for example cdc_ether, usbnet will also be added. After each installation make an lsmod to check.
With the orange pi zero 2, not all of these modules are available on the Armbian bone, but this does not seem to interfere with the operation. Cdc_ether and usbnet are missing. Likewise with the Rasopberry Pi 4, usbnet is missing.
As recommended on the Analog Device website, add in the folder :
/etc/udev/rules.d/
the rules file : 53-adi-plutosdr-usb.rules below. Type :
nano /etc/udev/rules.d/53-adi-plutosdr-usb.rules
# allow "plugdev" group read/write access to ADI PlutoSDR devices
# DFU Device
SUBSYSTEM=="usb", ATTRS{idVendor}=="0456", ATTRS{idProduct}=="b674", MODE="0664", GROUP="plugdev"
SUBSYSTEM=="usb", ATTRS{idVendor}=="2fa2", ATTRS{idProduct}=="5a32", MODE="0664", GROUP="plugdev"
# SDR Device
SUBSYSTEM=="usb", ATTRS{idVendor}=="0456", ATTRS{idProduct}=="b673", MODE="0664", GROUP="plugdev"
SUBSYSTEM=="usb", ATTRS{idVendor}=="2fa2", ATTRS{idProduct}=="5a02", MODE="0664", GROUP="plugdev"
# tell the ModemManager (part of the NetworkManager suite) that the device is not a modem,
# and don't send AT commands to it
SUBSYSTEM=="usb", ATTRS{idVendor}=="0456", ATTRS{idProduct}=="b673", ENV{ID_MM_DEVICE_IGNORE}="1"
SUBSYSTEM=="usb", ATTRS{idVendor}=="2fa2", ATTRS{idProduct}=="5a02", ENV{ID_MM_DEVICE_IGNORE}="1"
To make Adalm-Pluto work with GNU Radio, you need to install the following packages:
- apt-get install gr-iio
- apt-get install libiio-utils
- apt-get install gqrx-sdr
Once the installation is done you can check the access to Pluto with the command:
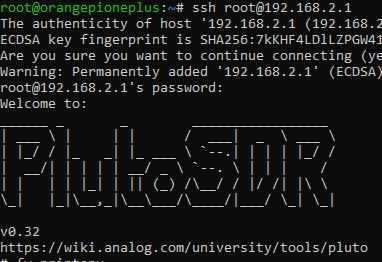
ssh root@192.168.2.1
The Pluto is physically connected by USB, but is accessible in ssh via an IP address 192.168.2.1. The password is ‘analog’.
At this point the PlutoSDRsink and source blocks are available in ‘GNU Radio Companion’.
To remotely access Pluto, you must add the paramiko package.
apt-get install python3-paramiko
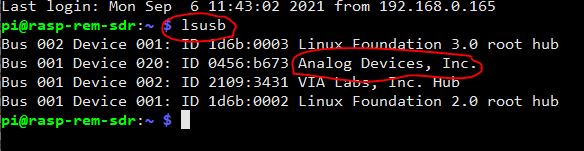
To test the interface with Adalm-Pluto, check that it is visible in the list of devices connected via USB by typing in a terminal: lsusb
Installation Serial Interface for SA818
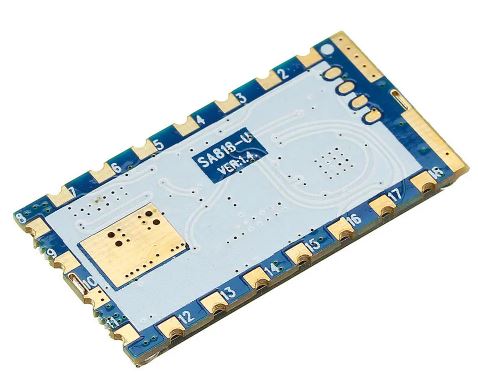
The SA818 module allows to transmit in VHF or UHF in NBFM with a power of 1w. It interfaces to the Orange Pi Zero 2 through the UART5 serial port and the ‘Line Out’ analog audio output. You have to install the python library for access to the serial port:
pip3 install pyserial-asyncio
Installation Remote SDR V4 files
All the files necessary for the execution of Remote SDR V4 must be installed in the / var / www / html folder of the web server. At first to facilitate the transfer from the source downloaded on Github to the Orange / Raspberry Pi, it is preferable to give all the permissions to the html folder.
chmod -R 777 /var/www/html
The same goes for the apache2 logs in / var / log
chmod -R 777 /var/log/apache2
Later, once everything is installed and operational, you can limit the access rights.
For Remote SDR it is necessary to launch on loading (boot) a python program which will manage the whole. For this in cron jobs we create a launch line. You absolutely have to be root to create the crontab attached to root. Make:
crontab -e
Write the following line at the bottom of the page.
@reboot python3 /var/www/html/start_radio_manager_at_boot.py
Now your system will be ready after a last reboot.
Please note that upgrading from Remote SDR V2 to Remote SDR V4 can only be done by completely replacing the OS as described in this article. We go from version 10 of Debian to version 11 and we go from version 3.7 to version 3.8 of GNU RADIO.
Launch of Remote SDR
If you are using an Adalm-Pluto, only one Orange PI Zero 2 or one Raspberry Pi4 is needed.
If you use a HackRF in transmission and a hackRF in reception you will need 2 Orange Pi Zero 2 with the same configuration or a single Raspberry Pi 4. You launch the application on one of the Orange PI at the address :
http://192.168.xx.xx
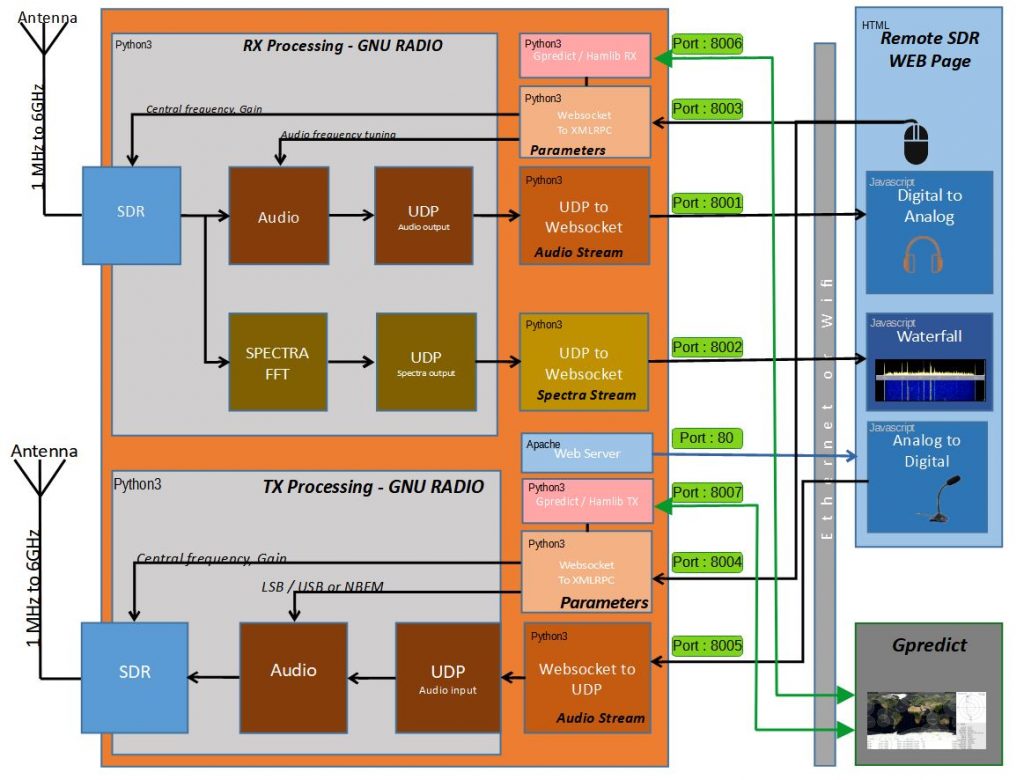
Note that the exchanges are done in http on the usual port 80 for the contents of pages.
Ports 8001 to 8003 are used to exchange data, via websockets, with the Orange / Raspberry Pi responsible for reception. Ports 8004 to 8005 are used to exchange data with the Orange / Raspberry Pi responsible for the transmission.
Since version v3 of Remote SDR, it is possible to interface with Gpredict via port 8006 for the receiver and 8007 for the transmitter.
In the case of a single processor, it processes all the exchanges on ports 8001 to 8007.
Software Architecture


Hallo OM,
today I install the Remote-SDR. It is fine.
But my Pluto-SDR has an other IP-Adress.
Not 192.168.2.1. I have IP 192.168.xxx.xxx.
Wich file must must I edit to write the new IP.
Many Tnx Henry DH5RUM
You have to open GNU-RADIO (in graphic mode) on the Raspberry-PI or Orange Pi and open all the files in the PY directory called pluto….grc. On the block osmocom, right click on properties and you modify the IP adress. Then you generate the code (Blue button generate Flow Graph). That’s all.
73
F1ATB
Hallo OM Andre,
I am using remote SDR 4.5.
I searched in .gnuradio for the PY directory to change the ip adress from pluto . but can’t find the right file.
Is there a change with a newer version.
Thanks so far,
Carlo PE1MWL
Carlo
You have to open the 2 pluto files “pluto_rx_sanw_v3.grc” , “pluto_tx_ssbnbfm_v3.grc” with Gnu Radio in the PY directory. You must be in graphic mode. Use for example VNC viewer if you have no screen connected to the Raspberry PI.
In each graphic, you have a block dedicated to the pluto. With the right button, you can access the property and change the value of the IP address.
73
F1ATB
Hallo Andre,
many Tnx for answer. I have the remote -sdr manually installled. But no connect to Pluto.
Then I installed the img and modified the chrome-browser. All function okay.
I use a i7-CPU and gentoo-linux as client. The CPU-Last is high.
Mni tnx for grc-modify information. Is interresting.
73 Henry DH5RUM