Remote SDR v2 – Raspberry 4B image installation
Obsolete. Go here
Remote SDR version 2.5 available on Github
Here is the detailed procedure to install Remote SDR version 2 on a Raspberry Pi 4B with at least 2 GB of memory. The latest images written for an SD card of 16 GB or more are available on Github.
https://github.com/F1ATB/Remote-SDR/releases
Remote SDR V2
Remote SDR is an application allowing remote control from a web browser of a radio transceiver based on 1 or 2 SDR (Software Design Radio).
The main features are:
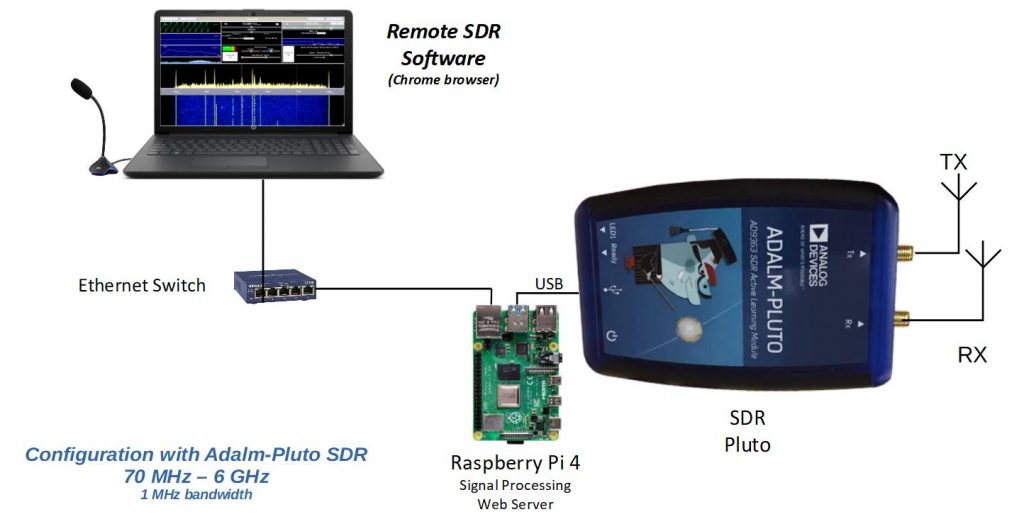
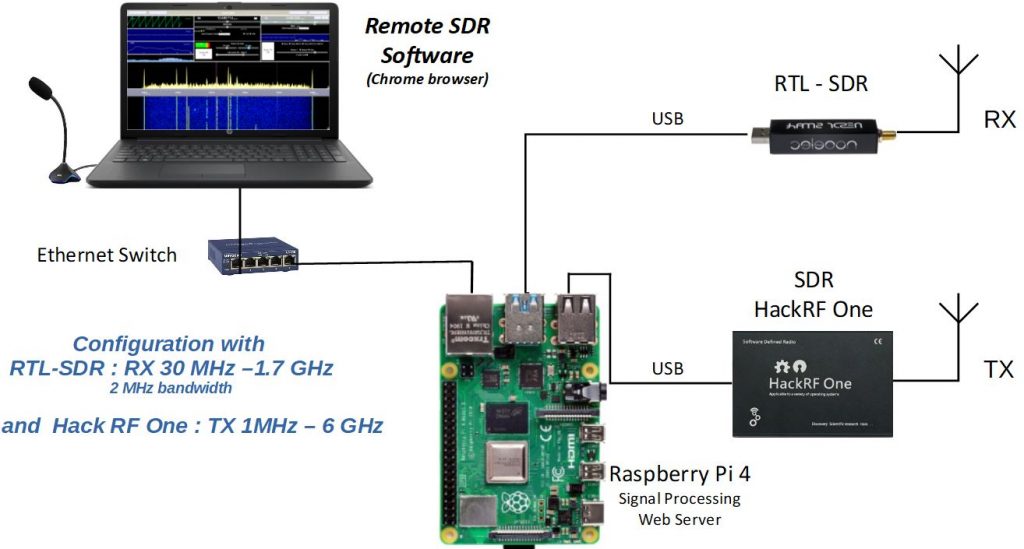
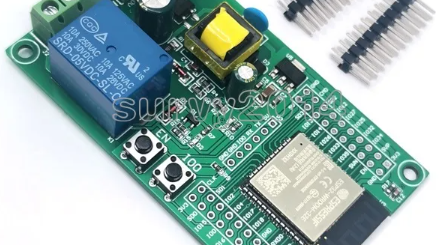
- Compatible with Adalm-Pluto SDR or HackRF One and RTL-SDR
- Reception in NBFM, WBFM, AM and SSB
- Transmission in NBFM or SSB with Pluto or HackRF One
- Full-Duplex transmission and reception
- Reception spectrum on 2048 FFT points
- System and SDR observation tools
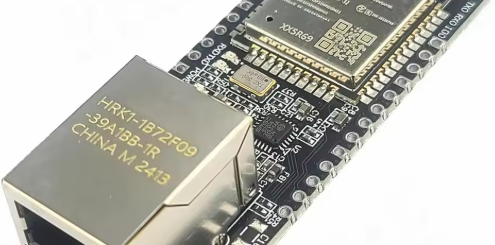
Installing the image for the Raspberry PI
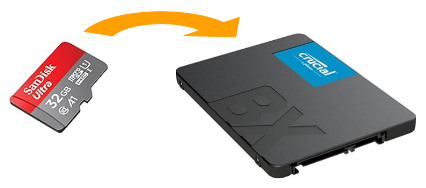
- Download the image corresponding to your card on Github https://github.com/F1ATB/Remote-SDR/releases
- Unzip the image
- Burn the image on a minimum 16GB micro SD card with PC software such as Win32diskmanager
- Connect a Pluto or HackRF One SDR and RTL-SDR
- Connect the Raspberry to the local Ethernet network
- Power on the Raspberry Pi
- Go to your box to find the IP address that has been assigned to the Raspberry Pi
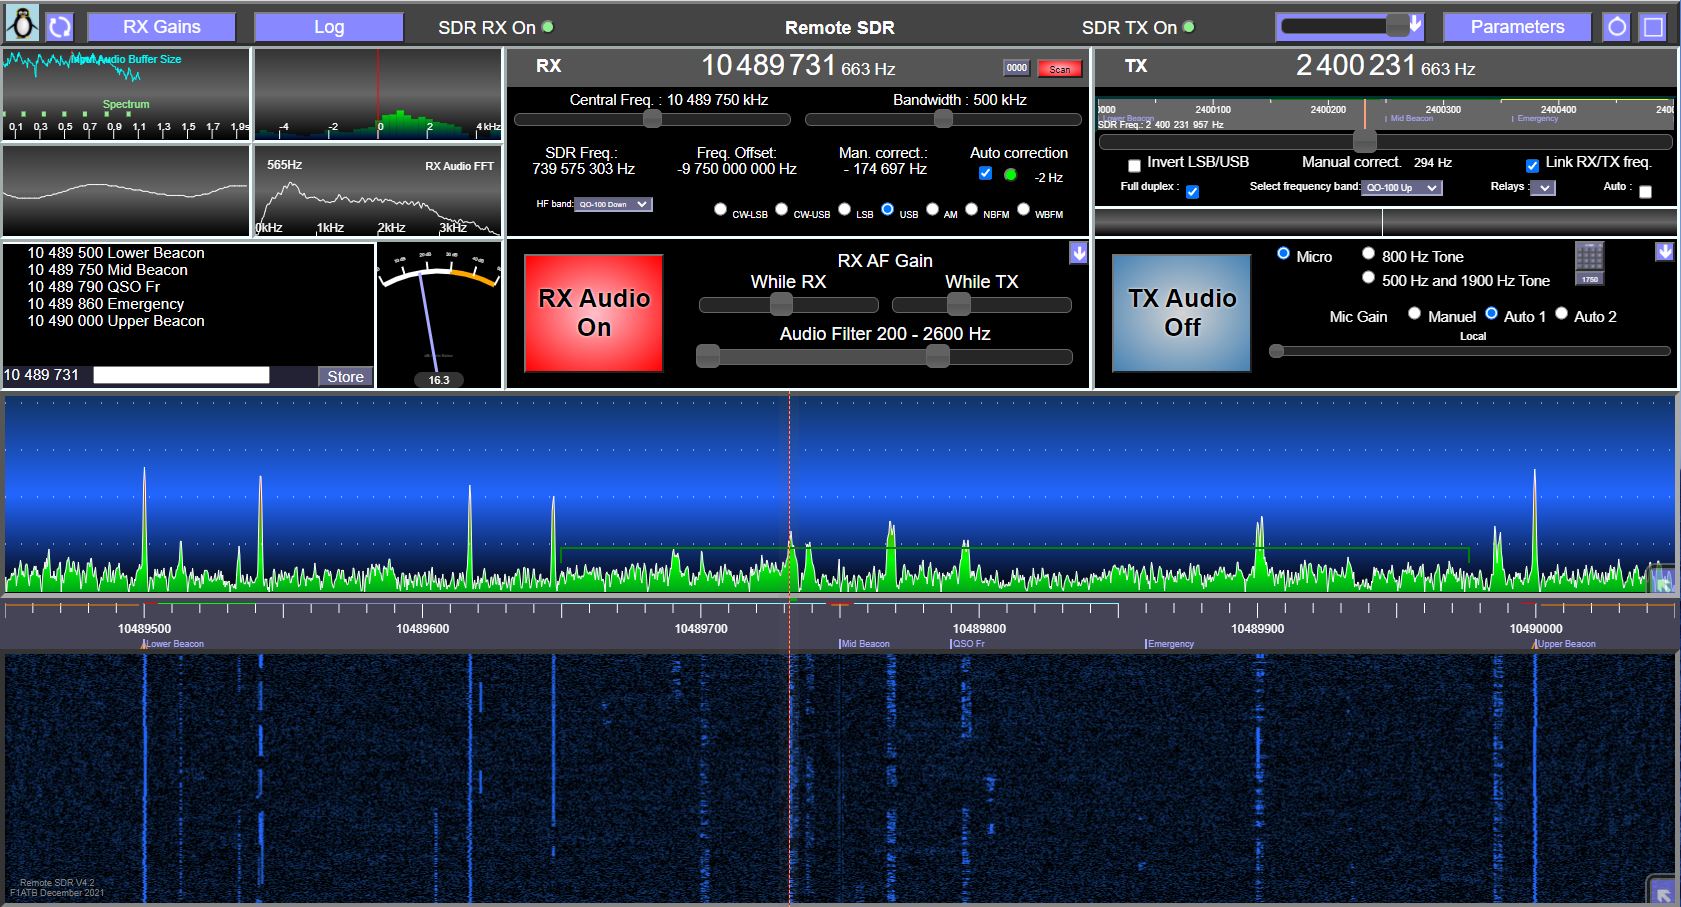
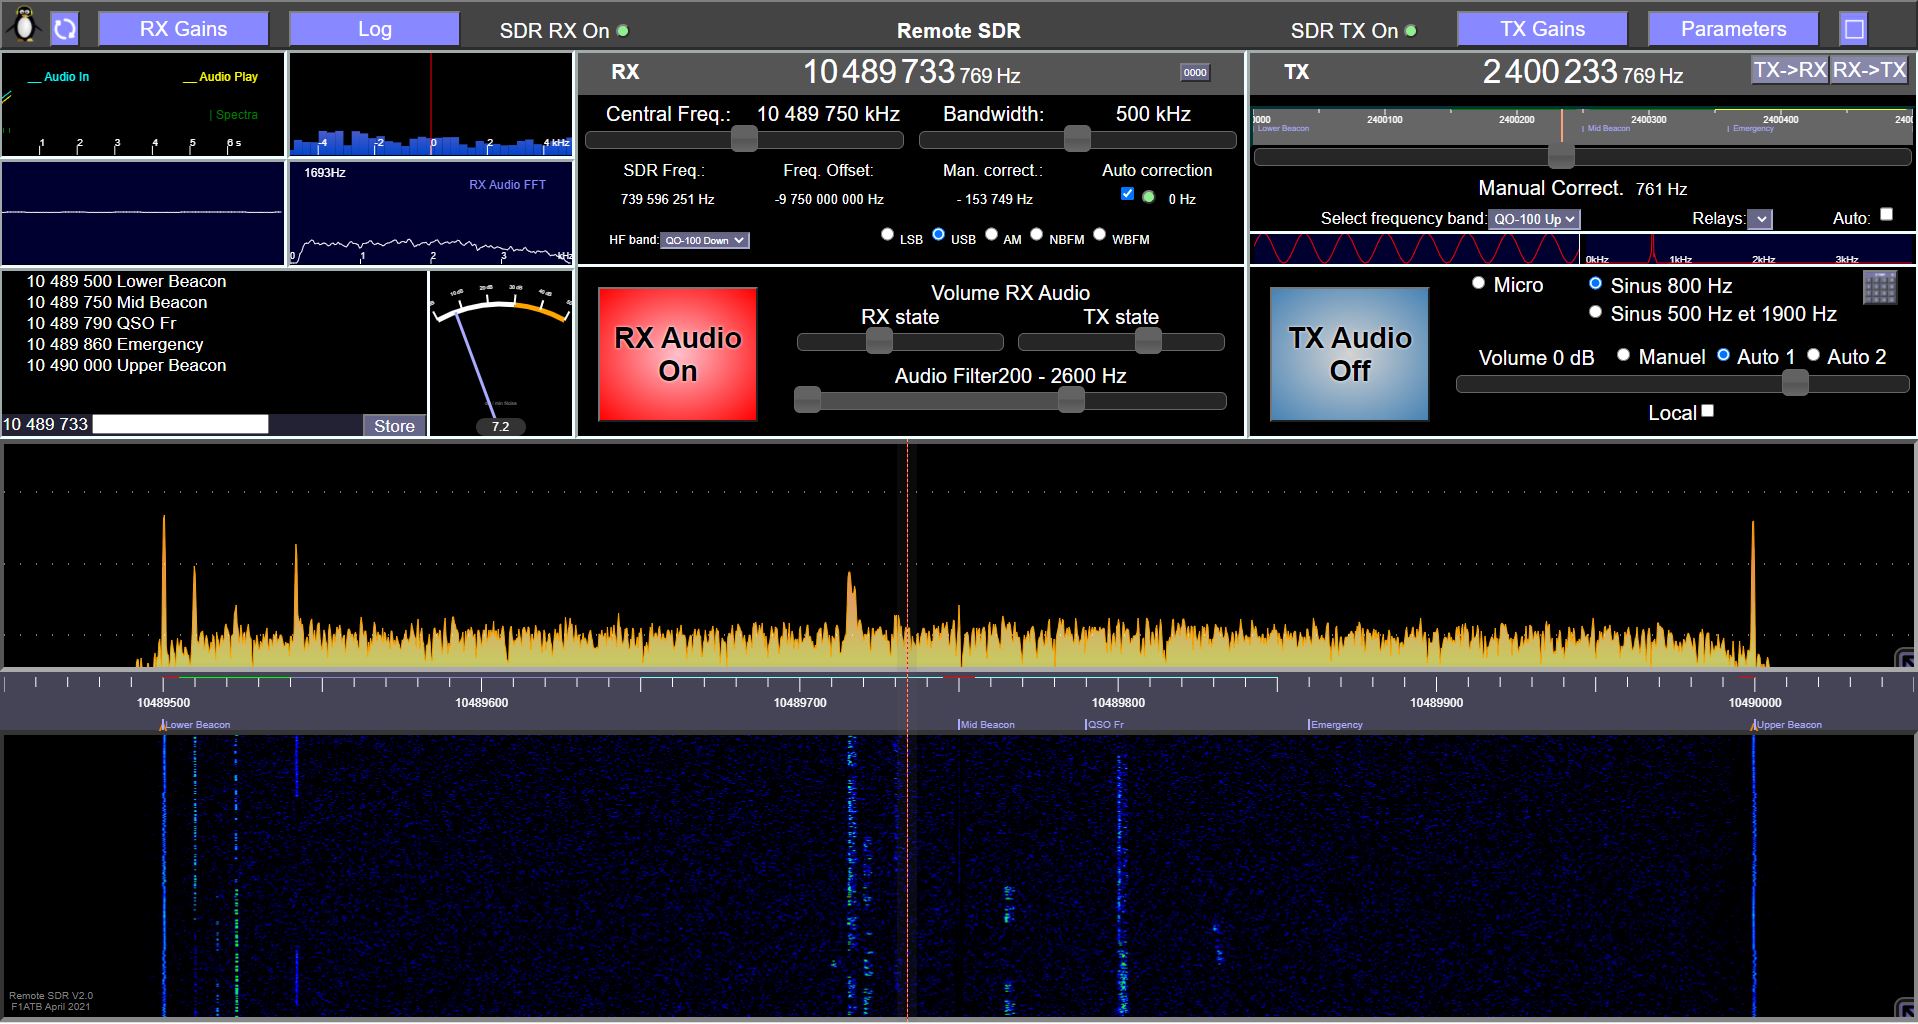
Launch of Remote SDR v2
Only one Raspberry PI 4 is necessary with an Adalm-Pluto or a HackRF in transmission and an RTL-SDR in reception.
Since Remote SDR version 2.5, two HackRF One can be connected to one Raspberry 4B.
You launch the application on the address:
http://<ip du Rasperry Pi>
You need a modern browser like Chrome or Edge. These do not give access to the microphone if the site does not have secure access in https. On your local network at home, you generally work in http simply. To get around this difficulty, the solution is to set up a derogation at the level of the web browser by accessing the “flags” parameters. you must type in the address bar:
with Chrome: chrome://flags
with Edge(2020): edge://flags
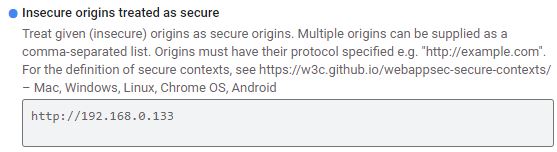
Look for the heading:
Insecure origins treated as secure
Fill in the form as below with the IP address of the Raspberry PI which provides the pages.
Note that the exchanges are done in http on the usual port 80 for the contents of pages. Ports 8001 to 8003 are used to exchange data with the Raspberry Pi of the reception part. Ports 8004 to 8005 are used to exchange data from the transmit part.
Customization of the installation
The image on Github is configured in English language, GB keyboard and GMT time. Access the Raspberry Pi in ssh (user pi, password: remsdr) and type:
raspi-config
In the ‘Location’ section you can enter your preferences.
You can also access the Raspberry Pi in graphics mode using the VNC extension from chrome or a dedicated application.
user : pi
password : remsdr
All sources are in the folder /var/www/html .
Quick SDR Test
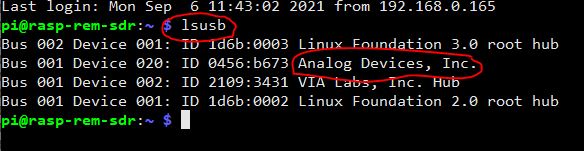
You can do a quick test to verify that the connected SDR (s) are visible to the Raspberry Pi 4. In a Terminal window, make a list of Usb(s ) by typing: lsusb
The devices present should appear.
Cooling
If you use your Remote SDR application intensely, consider putting a heat sink on the CPU. The processing load is important: around 60%.
Do not display Remote SDR on a monitor connected to the Raspberry and running in the web browser. If feasible, the processing load will be too great and this will result in audio losses and processor overheating.
Also, I recommend a transmitter security system as described here.
Video on Remote SDR V2
Posts about Remote SDR
- Remote SDR V5 -Raspberry 4B or Orange Pi Image Installation
- Remote SDR v5 – Manual Installation
- Remote SDR v5
- QO-100 Satellite Live
- RTTY
- Troubleshooting
- QO-100 Transceiver
- SSTV
- WSJT-X – FT8
- Omnirig – Remote SDR
- Communication Ports
- Tone generators
- Setting of GPIO outputs
- Band Scanning
- Gains and Dynamics
- Frequencies Management
- Launch of Remote SDR
- CPU Cooling
- Web GUI
- Microphone and signal processing authorization
- Configurations
- Characteristics
- Introduction to Remote SDR
- Remote SDR – Audio Channels
- CW with Remote SDR
- Rotary Knob and Morse Manipulator for Remote SDR
- VHF and UHF NBFM Transceiver
- Remote SDR v4
- Gpredict — Remote SDR
- Remote SDR V4 – Raspberry Pi 4B or Orange Pi Zero 2 image installation
- Remote SDR v4 – Manual Installation
- SA818 – RTL-SDR
- Remote SDR – Examples of realization
- Transmit over QO-100 satellite with a Smartphone
- Remote SDR V2 – Software Architecture
- Remote SDR V1- Purchase
- Remote SDR V1 – Man Machine Interface
- Remote SDR V1 – Signal Processing
- Web Client to GNU Radio
- GNU Radio to Web client
- Remote SSB Transmitter
- Remote SSB Receiver
- GPIO on Orange PI One Plus H6
- TCXO installation on HackRF
- Q0-100 Transceiver with 2 SDR – Remote SDR V1


I have just tried on Raspberry Pi4 and it works nicely. Thanks!
Is it possible to connect to the Pi4 via WiFi?
Yes, you can connect via Wifi. You need a good signal to avoid any cut during a QSO. I did already.
73
F1ATB
Will this work with LimeSDR Mini?
No, LimeSDR is not working with RemoteSDR.
HI.
Can I interconnect RaspberryPi and PlutoSDR via my LAN or does this image only support PlutoSDR and RaspberryPI interconnected via USB?
73’s Christiaan PA3FUN
For the moment, Remote SDR processes only Pluto connected in USB.
Regards
André
Hello Andrè
I installed the Raspberry Pi4 with an external 10″ screen.
It shows your software in the Web-Browser, but your software is not able to find my “USB” attached Pluto. Normally I’m using this Pluto connected via ths same USB-cable with my Win10 Notebook in order to run the SDR Radio Console from Simon.
Any idea?
73 de HB9RYZ
Wolfgang
You have probably a power supply deficiency. Add an additional one on the right usb plug.
In a window terminal, type: lsusb to list the usb devices. You should see Analog mentioned in the list.
Some additional explanation here: https://f1atb.fr/index.php/2021/03/18/nbfm-transceiver-with-pluto-sdr-and-gnu-radio/
Test also the Pluto as mentioned here:
https://f1atb.fr/index.php/2021/05/03/remote-sdr-v2-tips/
It seems you display Remote SDR by using the same Raspberry PI. The co-processing of the graphics and Remote SDR signal processing together is a little bit too important. The video and audio will not be fluid.
73
André
Ola, possuo apenas raspiberry pi 3. Sera que funciona? Existe algum outro projeto semelhante que eu consiga utilizar um raspi 3 ?Obrigado.
Ele não funciona com um Raspberry Pi 3. Ele não possui capacidade de computação.
Do you plan to implement CW keyer?
Good question as it is a simple signal processing. The question is, how to enter in a browser a key? I have some ideas, but I am open to suggestions.
73
André
F1ATB
Do you opinion on what is better performance? Two piZero 2 or 1 RPI4?
TY
Jeff
As you speak about 2 Orange Pi Zero 2, I suppose you intend to have one “RTL-SDR” and a “HackRF One” or two “HackRF One” as SDRs. It’s nor a Pluto SDR configuration.
For the user, there is no difference between 2 Opiz2 and a Rpi4. Today it’s only the cost which make difference. Personally, on My QO-100 setup I used daily, I have moved recently from Orange Pi to Raspberry Pi 4 and I see no difference. 73
This is a very nice and well thought out interface. The installation onto an SD card using the image is very good too. No issues. I put the card into a Raspberry Pi 4B and the image comes up nicely and I was able to log into the remote SDR. I have just bought an sdr_rtl V3 on amazon and was excited to try to listen to HF 80m on 3.900. NO success. I can hear FM broadcast band here in the USA ok and that is about it. I can hear some aircraft a little too.
I read about having to use direct sampling mode on the rtl_sdr dongle by setting a Q Branch setting to the driver but not sure how to do that using this remote sdr. I was able to ssh in and have been looking around. My sincere complements. This is a very well done system and transceiver. It is very exciting to access it from a laptop or a PC when it is running on a PI4.
Very well done. I have done a little javascript and HTML programming but not to the level of this fine effort. Jeffrey KB3W/6
Jeffrey
Happy to hear that you installed Remote SDR with success. Now, for the RTL-SDR in HF (below 30MHz), I know that there is a possibility to turn-around the limitation. I have not tested yet, I put that on the wishes list of the future evolutions.
73
André