Remote SDR V2 – Manual installation
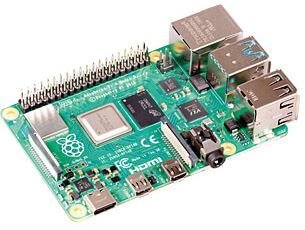

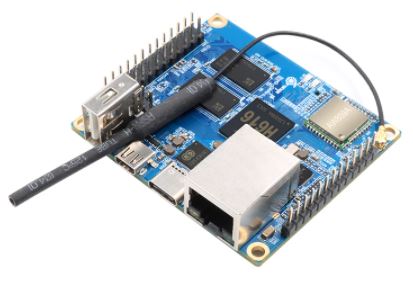
Below is the detailed procedure to install Remote SDR version 2 on a Raspberry Pi 4 B (2GB), an Orange Pi One Plus or an Orange Pi Zero 2. It is adaptable for other ‘Single Board Computer’ cards if they are available. have the necessary computing power.
Sources are available on Github https://github.com/F1ATB/Remote-SDR
Now, in September 2021, version 2.4 is released. It runs on the Raspberry Pi 4B in addition to the Oranges Pi.
Remote SDR V2 – Evolutions
Remote SDR is an application allowing remote control from a web browser, a radio transceiver based around 1 or 2 SDR (Software Design Radio). Introduction on Remote SDR V2 is available here: https://f1atb.fr/index.php/2021/05/03/remote-sdr-v2-2/
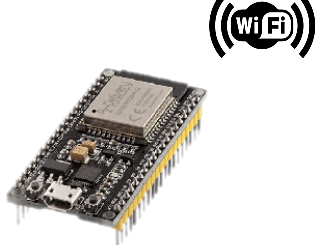
The Orange Pi One Plus is a “Single Board Computer” card which, thanks to a 4-core 64-bit processor, provides the computing power necessary for signal processing at a cost of less than 40 €. In 2021, a new Orange Pi Zero 2 card with a similar processor also offers a WIFI connection, which facilitates the installation of the assembly remotely. For version 2.4, it also runs on a Raspberry Pi 4B with 2GB of memory or more. The main changes brought by this new version of Remote SDR are:
- Adalm-Pluto SDR compatibility in addition to HackRF One and RTL-SDR
- Reception in NBFM, WBFM, AM in addition to SSB
- Transmission in NBFM or SSB with Pluto or HackRF One
- Reception spectrum on 2048 FFT points instead of 1024
- Supply of system and SDR observation tools

Linux System Installation
Before installing the radio signal processing, the basic operating system must be installed.

For Orange Pi, the procedure is detailed here:
– Orange Pi One Plus : system Armbian
https://f1atb.fr/index.php/2020/09/01/orange-pi-one-plus-setup/
– Orange Pi Zero 2 : system Debian
https://f1atb.fr/index.php/2021/05/06/orange-pi-zero-2-setup/
For greater ease of installation, do everything in ‘root’ for Remote SDR V2. It is necessary:
- Download the Linux operating system for ARM processors, Armbian Buster (April 2021) from armbian.com for the Opi One Plus or Debian from www.orangepi.org for the Orange Pi zero 2 and load it onto a microSD card.
- Obtain the IP address
- Update the distribution ( sudo apt-get update and sudo apt-get upgrade)
- Set up the desktop
- Install TightVNC to view the remote desktop
- Install Samba if you want to access files from your Windows PC rather than SSH.

Download the Raspberry Pi Os operating system, the desktop version without the recommended software. https://www.raspberrypi.org/software/operating-systems/#raspberry-pi-os-32-bit
- Obtain the IP address
- Update the distribution
- Make a Raspi-config in a terminal or go to settings to activate SSH access and VNC access
- Configure Samba if you want to access files from your Windows PC rather than SSH.
Note for VNC on Raspberry Pi 4
VNC operation requires some tweaking for a large resolution.
sudo raspi-config, then display and resolution. Choose for example DMT 82 1920 * 1080
sudo nano /boot/config.txt
Update the config.txt file like this:
hdmi_ignore_edid = 0xa5000080
hdmi_group = 2
hdmi_mode = 82
The line “hdmi_ignore_edid…. ” is essential.
For all the commands to follow, I prefer to work directly as root. Done in a terminal : sudo su
One of the big differences introduced by version V2 is the use of Apache as a web server rather than the basic functionality provided by Python. Installation is simple as described here:
https://f1atb.fr/index.php/2020/11/12/apache-on-orange-pi-zero/
Raspberry Pi or Orange Pi the procedure is identical. The installation will be done in the / var / www / html folder. It is this folder that we will use later and in which we will put a cgi-bin folder for dynamic pages.
The Apache configuration file must be adapted:
nano /etc/apache2/sites-available/000-default.conf
<VirtualHost *:80>

	ServerName localhost

	ServerAdmin webmaster@localhost
	DocumentRoot /var/www/html

	ScriptAlias "/cgi-bin/" "/var/www/html/cgi-bin/"
	<Directory "/var/www/html/cgi-bin/">
                AllowOverride None
                Options +ExecCGI
                AddHandler cgi-script .cgi .pl .py
                Require all granted
    </Directory>

	ErrorLog ${APACHE_LOG_DIR}/error.log
	CustomLog ${APACHE_LOG_DIR}/access.log combined


</VirtualHost>
Remember to activate the cgid module by typing:
a2enmod cgid
Now you have a complete operating system with a web server on port 80 which you can access at http: //<ip address>
GNU Radio Companion Installation
GNU Radio is a very powerful tool for modeling signal processing chains. GNU Radio Companion is a complementary tool allowing to build radio processing chains graphically without writing a line of code. So far for Debian Buster there is only version 3.7.13 which is considered stable.
apt-get install gnuradio
For the Orange Pi, install LXTerminal
apt install lxterminal
Add to the configuration file /etc/gnuradio/conf.d/grc.conf in the [grc] section
[grc]
xterm_executable = /usr/bin/lxterminal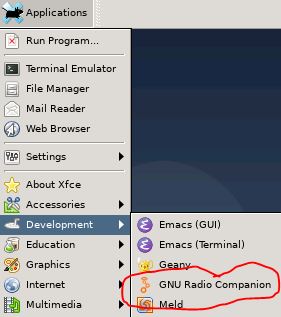
Switch to graphical mode using VNC (extension in chrome). Launch ‘Gnu Radio Companion’ if you want to find out. It is a fantastic graphical tool for creating signal processing chains. Examples can be found in the / usr / share / gnuradio / examples folder.
Osmocom SDR and RTL-SDR Driver Installation
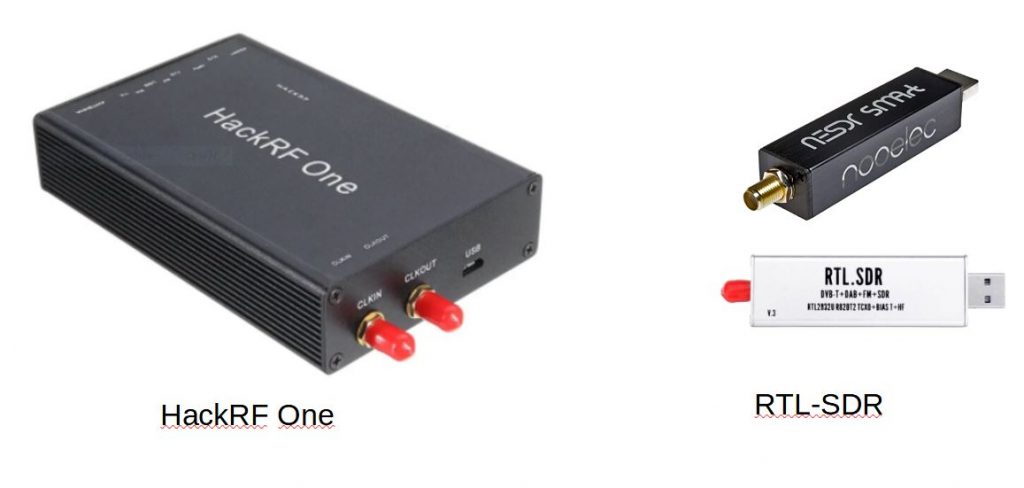
To interface Gnu Radio with an SDR such as Hack RF One or one of the many RTL-SDRs, the Osmocom module must be installed. As a reminder, HackRF covers from 1 MHz to 6 GHz in transmission or reception with an 8-bit dynamic encoding. RTL-SDR depending on the model, covers from around 30 MHz to 1.7 GHz in reception only with 8-bit coding. It is very interesting for its price.
Installation of the USB library and the compilation tool:
apt-get install cmake build-essential libusb-1.0-0-dev
apt-get install pkg-config
We clone Osmocom in the Downloads folder of the root user, for example:
cd ~/Downloads
git clone https://github.com/osmocom/rtl-sdr.git
Go to the rtl-sdr folder and chain the commands:
cd rtl-sdr
mkdir build
cd build
cmake ../ -DINSTALL_UDEV_RULES=ON -DDETACH_KERNEL_DRIVER=ON
make
make install
ldconfig
Installation of the Osmocom source module
apt-get install gr-osmosdr
Now the Osmocom module must be present in the list of processing blocks of ‘GNU Radio Companion’. It is possible to do signal processing on data from hackRF One or RTL-SDR.
By plugging a HackRF One into the Orange/Raspberry PI’s USB port, you can check its presence by installing the hackrf package and typing in a terminal:
apt install hackrf
hackrf_info
With an RTL-SDR on the USB port, you have information by typing:
rtl_eeprom
or
rtl_eeprom -h
Adalm-Pluto interface installation
The Adalm-Pluto is an interesting solution capable of working in Full-Duplex (simultaneous reception and transmission) in a frequency band between 325 MHz to 3.8 GHz. It is possible to extend the frequency range of Pluto from 70MHz to 6GHz. This is described in the following post : https://f1atb.fr/index.php/2021/03/09/frequency-extension-of-pluto-sdr/
To interface with ‘GNU Radio’, details are provided in this post on a simple NBFM transceiver.
https://f1atb.fr/index.php/2021/03/18/nbfm-transceiver-with-pluto-sdr-and-gnu-radio/

Once the installation is done you can check the access to Pluto with the command:
ssh root@192.168.2.1
The Pluto is physically connected by USB, but is accessible in ssh via an IP address 192.168.2.1. The password is ‘analog’.
At this point the PlutoSDRsink and source blocks are available in ‘GNU Radio Companion’.
To remotely access Pluto, you must add the paramiko package.
apt-get install python3-paramiko

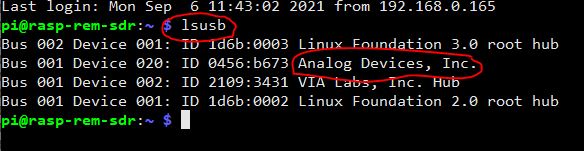
To test the interface with the Adalm-Pluto, check that it is visible in the list of devices connected via USB by typing in a terminal: lsusb
Websockets Installation
For python 3, you must add the websockets library which allows exchanges with the web browser. We install the pip installer, setuptools and websockets with the following commands:
apt install python3-pip
apt-get install python3-setuptools
pip3 install wheel
pip3 install websockets
Installation of Remote SDR V2 files
All the files necessary for the execution of Remote SDR V2 are to be installed in the / var / www / html folder of the web server. At first to facilitate the transfer from the source downloaded on Github to the Orange/Raspberry Pi, it is preferable to give all the permissions to the html folder.
chmod -R 777 /var/www/html
Once the files are in place, you must ensure access rights. Go to the html, PY and cgi-bin folders to set the 777 rights for the .py files
chmod 777 *.py
Set for .txt files in PY
chmod 666 *.txt
Likewise for .sh files in cgi-bin.
chmod 777 *.sh
Likewise for the apache2 logs in var / log
chmod -R 777 apache2
For Remote SDR it is necessary to launch on loading (boot) a python program which will manage the whole. For that in cron jobs we create a launch line. You must absolutely be root to create the crontab attached to root. Make:
crontab -e
Write the following line at the bottom of the page.
@reboot python3 /var/www/html/start_radio_manager_at_boot.py
Now your system will be ready after a last reboot.
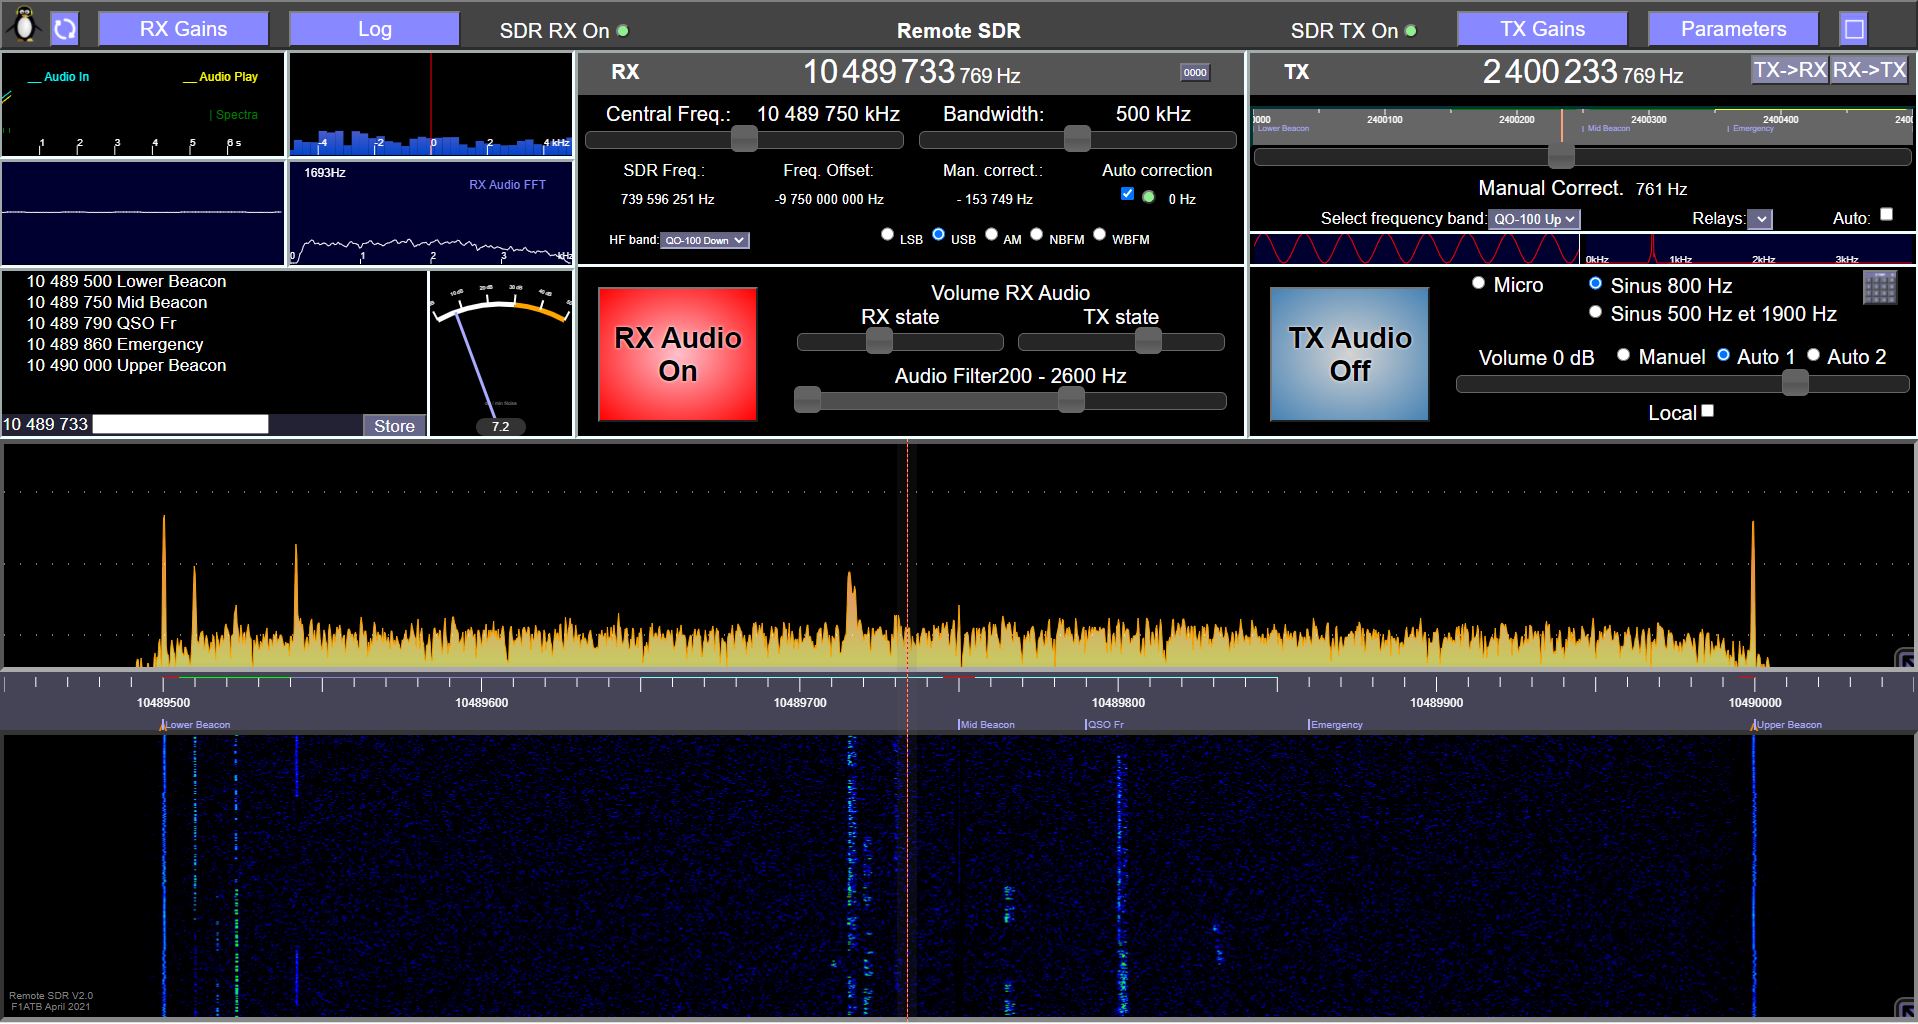
Launch of Remote SDR v2
If you use an Adalm-Pluto or the pair HackRF for transmission and RTL-SDR for reception, a single Orange PI or a single Raspberry Pi is necessary.
If you use a HackRF in transmission and a hackRF in reception you will need 2 Orange / Raspberry Pi with the same configuration. You launch the application on one of the Orange/Raspberry Pis at the address:
http://192.168.xx.xx
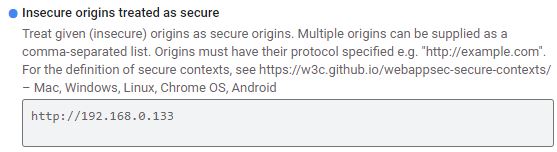
You need a modern browser like Chrome or Edge. These do not give access to the microphone if the site does not have secure access in https. On your local network at home, you generally work in http simply. To get around this difficulty, the solution is to set up a derogation at the level of the web browser by accessing the “flags” parameters. you must type in the address bar:
with Chrome: chrome://flags
with Edge(2020): edge://flags
Look for the heading:
Insecure origins treated as secure
Fill in the field as below with the IP address of the orange PI which provides the pages.
Ports 8001 to 8003 are used to exchange data with the Orange / Raspberry Pi responsible for receiving. Ports 8004 to 8005 are used to exchange data with the Orange / Raspberry Pi responsible for transmission.
In the case of a single processor, it processes all the exchanges on ports 8001 to 8005.
Articles describing Remote SDR
- Remote SDR V5 -Raspberry 4B or Orange Pi Image Installation
- Remote SDR v5 – Manual Installation
- Remote SDR v5
- QO-100 Satellite Live
- RTTY
- Troubleshooting
- QO-100 Transceiver
- SSTV
- WSJT-X – FT8
- Omnirig – Remote SDR
- Communication Ports
- Tone generators
- Setting of GPIO outputs
- Band Scanning
- Gains and Dynamics
- Frequencies Management
- Launch of Remote SDR
- CPU Cooling
- Web GUI
- Microphone and signal processing authorization
- Configurations
- Characteristics
- Introduction to Remote SDR
- Remote SDR – Audio Channels
- CW with Remote SDR
- Rotary Knob and Morse Manipulator for Remote SDR
- VHF and UHF NBFM Transceiver
- Remote SDR v4
- Gpredict — Remote SDR
- Remote SDR V4 – Raspberry Pi 4B or Orange Pi Zero 2 image installation
- Remote SDR v4 – Manual Installation
- SA818 – RTL-SDR
- Remote SDR – Examples of realization
- Transmit over QO-100 satellite with a Smartphone
- Remote SDR V2 – Software Architecture
- Remote SDR V1- Purchase
- Remote SDR V1 – Man Machine Interface
- Remote SDR V1 – Signal Processing
- Web Client to GNU Radio
- GNU Radio to Web client
- Remote SSB Transmitter
- Remote SSB Receiver
- GPIO on Orange PI One Plus H6
- TCXO installation on HackRF
- Q0-100 Transceiver with 2 SDR – Remote SDR V1


Hello Alain & All,
Got error invalid command ‘bdist_wheel’ returned when pip3 install websockets
One must execute pip3 install wheel before to get rid of this error.
Observed on Orangepi zero2 Debian 10 distro.
Don’t remind such a behavior when installed on raspberry pi4
vy 73 de Franck
Thank you Franck for your remark. I have updated the installation procedure.